Sunday, December 27, 2009

Pomegranate Chicken Soup


So many of us have a freezer full of turkey or chicken stock after the holidays...I use it in stirfrys, risottos and soups! Especially in the cold days of winter there is nothing better than a bowl of heartwarming soup. Rather than make a big pot of one soup, I freeze my stock in smaller containers so I can make a new soup every night or two.

My last soup was chicken with bok choy and pomegranate seeds! It was fantastic. The few ingredients means I can whip it up in no time at all. I just added left over chicken and freshly chopped bok choy to the stock and heated it up. When I dished it, I added a handful of pomegrante seeds. The bok choy is tender crisp and the seeds add a great bit of freshness and sweetness which plays well off my stock which is generally a bit spicy.

The green and red colours also make a great presentation. Try it. I bet you'll like it!


Newfoundland Dip

The Christmas party season means dips, dips and more dips. Here's one that might look a bit strange on paper but in your mouth it works perfectly! I don't have a picture because it was devoured before I had a chance!


Newfoundland Dip


Mix all of the ingredients below in medium bowl.


1/2 cup mayonaise or miracle whip

2 tbsp ketchup

2 tbsp honey

2 tbsp onion flakes

1/2 tsp curry

7 drops of tabasco sauce

Salt to taste.


Great with veggies especially celery, carrots and peppers.

Wednesday, December 23, 2009

Pine nut and Cranberry Granola

This is a great recipe that can be changed up to suit your mood - substitute different nuts, spices, or dried fruit depending on what's in your pantry!
From granola
Ingredients3.5 cups large flake oats
1/2 cup slivered almonds
1 cup cashews
1 cup pine nuts
3/4 sweetened shredded coconut
1 tbsp cinnamon
1/3 cup brown sugar
1/4 cup vegetable oil
1/4 cup honey
1/4 cup maple syrup
3/4 teaspoon salt
1.5 tsp vanilla
1 cup craisins or other dried fruit

Directions
Preheat oven to 275 degrees.

Mix oats, all nuts, coconut, cinnamon and brown sugar in a large bowl.
In another bowl stir together oil, honey, maple syrup, salt and vanilla.

Add oil mixture into dry ingedient bowl and mix until combined.
Spread mixture evenly over two large cookie sheets lined with parchment or silpats.

Put in oven and bake for about 65 - 75 minutes. Stir every 15 minutes to ensure even browning. Keep an eye on them during the last 15 minutes as they can go from brown to burnt quite quickly. Take out of oven and cool for ten minutes. Put granola in large bowl and add craisins. Mix. Once cooled place in air tight container. Enjoy on its own or with yogourt.
From granola

Thursday, November 26, 2009

Deconstructed Peanut Butter and Banana Sandwich

From deconstructed peanut butter and banana
I have to admit one trend I have not enjoyed in the world of food is deconstruction!  I know, I know some say deconstruction isn't just about taking a dish apart but putting the pieces into a new form.  But really, if I want a salad, I don't want to have to cut up the head of lettuce myself, mix the dressing and make my own croutons...I'm paying for someone to make my dinner for me and serve it so all I have to do is eat it....otherwise I can stay at home. I'm sure there are amazing deconstructed dishes out there, it's just not my thing. And the new thing of deconstructed drinks!??! Don't get me started!

Anyhoo, I told you this because I am admitting that I made a deconstructed meal the other night. My 5 year old daughter is usually a good eater as long as it doesn't involve any form of a potato (not even a french fry!). But, of course, the one night I am beyond tired and slightly cranky she decides that she wants nothing to do with the meal we had planned.
From deconstructed peanut butter and banana
I decided to be nice and I offered to make her a pb and j sandwich for dinner instead ... she refused. Normally, that would have been my final offer figuring when she got hungry enough she'd come around but I decided to try a different tactic. I cut up a banana, melted some peanut butter in a small bowl, cut up a tortilla and added a toothpick... stuck it on a plate and offered up a "deconstructed peanut butter and banana sample platter"... I've learned that if I don't call it "dinner" my kids are more interested in it ... sometimes. I am proud to say it worked! The plate was wiped clean, there were no tantrums (from me or her), and bellies were full. I didn't cure a disease, find a lost civilization or write a best seller but I did get my daughter to eat a nutritious dinner... a success in my book!

Tuesday, November 24, 2009

Brown Sugar & Walnut Coffee Cake

Of all the baking I do, this is by far the most requested recipe. It is my Mom's recipe. It is the perfect coffee cake - not too cakey, but not dry. As my husband says, the cake is not so sweet or fluffy that it makes you feel guilty about having it for breakfast! The brown sugar topping that is scattered in the middle and the top is delicious and nutty. In all honesty, I often double the topping because you can't have too much of it! The icing drizzled on top adds the perfect extra sweetness to this amazing coffee cake.

From brown sugared coffee cake
Topping:
1/2 cup brown sugar
2 tbsp flour
2 tsp cinnamon
2 tbsp melted butter
1/2 walnuts

Mix all of the above together and let stand.

Batter:
1/4 cup buttter
3/4 cup whte sugar
3/4 cup milk
1 egg slightly beaten
1 tsp vanilla
1.5 cups flour
2 tsp baking powder
1/2 tsp salt

Icing:
1/4 cup commercially prepared icing

Cake:
Cream butter and sugar for three minutes.
Add egg and vanilla.
In another bowl sift or whick together flour, baking powder and salt.
Add sifted ingredients, alternately with milk (3 flour: 2 milk) and mix with each addition..
Put 1/2 batter into greased tube pan.
Add half of topping.
Add rest of batter.
Add rest of topping spreading evenly.

Bake at 350 degrees for 30 minutes or until toothpick comes out clean.
Cool cake 10 minutes, remove from pan and flip so topping side faces up.
Ice while still warm by microwaving it for 10 seconds and then drizzling over cake (I know commercially prepared icing will make some of you revolt but seriously after years of making this cake it is exactly what it needs).

Wednesday, November 18, 2009

Soft and Chewy Ginger Snaps or Is My Mother a Liar?

From Ginger Snaps
Is my mother a liar? That is the life altering question I am pondering tonight. You see my Mom makes the best ginger snaps I have ever had the pleasure of eating in my life. They are encrusted in a delicate sugar coating, and when my teeth sink into the body of the cookie they are met with a soft and yielding cookie that is sweet and spicy and full-bodied. I love these cookies.  But these cookies are at the root of the question tonight - is my mother a liar?

You see, I wanted to look into the history of the ginger snap so I googled it, of course. PS btw, what the heck did we do before the ability to google? I have a love/hate relationship with googling - but that will have to wait for another blogging day. Anyways, I googled "ginger snaps". The first definition I see is "traditionally, the cookies are very crispy, so that they make a snapping noise when they are bitten into." Now do you see the problem?? If not, read the first paragraph again! The cookie I have viewed as the quintessential ginger snap are SOFT!! There is no "snapping" noise! There is no sound except for a gutteral "mmmm" coming from somewhere within me! And if this is true, what other life shattering lies has my mom told me... am I not the most beautiful girl in the world?? Is it possible I don't need an extra ten pounds on my body just in case I get sick?? Is my singing voice not up there with Celine Dion's?? Could my mother possibly be deceiving me in these areas too?? Oh the horror of it all!

It's too much to deal with tonight. I have decided that somewhere in the world ginger snaps were named ginger snaps because they are snapped up as soon as they are baked! That's my story and I'm sticking to it. Most importantly, it means my Mom is not a liar and I don't have to lose 10lbs, stop singing or start saving for a face lift. Phew. And, in case you are interested, here is my mom's recipe for her amazing, aptly named Ginger Snaps... :)
From Ginger Snaps

Ingredients
3/4 cup butter
1 cup white sugar
1 egg
1/2 cup molasses
2.5 cups flour
2 tsp baking soda
2 tsp ginger
1 tsp cinnamon
3/4 tsp salt

extra granulated sugar in bowl for dipping cookies
From Ginger Snaps
Method
1. Cream butter and 1 cup sugar well.
2. Beat in egg.
3. Mix in molasses.
4. In another bowl, stir together flour, baking soda, ginger, cinnamon, and salt.
5. Add to the creamed mixture and mix well.
6. Shape into 1 inch balls.
7. Roll in sugar and on baking sheet.
8. Bake at 350 degrees for 10-12 minutes.

Makes about 4 dozen cookies.

Saturday, November 14, 2009

Kitchen Sink Stuffed Peppers

From stuffed peppers
Saturday night and the kids are fed and in bed by 6:30pm - whoop! That leaves a large and important question, "What are we having for dinner?" The answer: kitchen sink stuffed peppers. Yum!

No recipe tonight just a cleaning out of the fridge and throwing things in a pan. Ground beef, a white onion, a big leek, 4 cloves of minced garlic, a couple of teaspoons of freshly grated ginger, some chopped, rather limp carrots, frozen spinach, and spices including celery seed, curry powder, salt, pepper, cayenne, and thyme. All of this went into the pan and sauteed until done.

While that was going on, I also cooked up a pot of of basmati rice which went into the saute pan when done.

Three red peppers were cleaned and cut. For a topping, I mixed some feta cheese, a handful of walnuts, and some breadcrumbs together with three tablespoons of melted butter.

After a half an hour or so in the oven (375 degrees) it was dinner time! Happy Saturday to all and to all a goodnight!
From stuffed peppers

Friday, November 13, 2009

Parmesan and Pea Risotto with Lime-Butter Prawns

From Pea & Parsley Risotto
Let me begin with a disclaimer: I am in no way Italian - unless there are a few secrets in my family there is not a drop of Italian blood in me. I did not have Italian neighbours and it wasn't until I was in my 20's that I had a friend who was of Italian heritage. So really - I have little experience to tell you that this is what risotto should look like or taste like ... but I do know I love this dish ... creamy, aromatic and delicious.

The basic recipe is from Micheal Smith who is a Canadian Chef. I have been a fan of his for years but even more so after he published a book without a lot of direction. Sounds crazy but he thinks you should cook with your heart and senses... a go with the flow kind of approach. To check out this great chef and his book go here http://www.chefmichaelsmith.ca/en/home/default.aspx

To his basic recipe I added lime & butter prawns, more cheese, more garlic and used less broth than recommended. Try it with your own tweaks and favorite flavours - you won't be disappointed.

Parmesan and Pea Risotto with Lime-Butter Prawns
Ingredients
From Pea & Parsley Risotto

• 6-8 cups chicken stock – I used homemade
• 1 onion, peeled and chopped
• 1 leek, sliced
• 1 shallot
• 3 tbsp olive oil
• 6 cloves garlic, peeled and minced
• 2 cups Arborio rice
• 1 cup white wine
• 1 cup frozen peas
• 1 handful chopped parsley
• 1 cup grated freshly Parmesan cheese
• 1 tbsp butter
• Salt and pepper
• 10-20 prawns
• ¼ c lime juice
• 2 tbsp butter
• 1 tbsp oil

Directions For Risotto

1. Heat chicken stock in a saucepan. It has to be very hot.
2. In another medium saucepan, sauté the 3 kinds of onions with the olive oil over medium high heat until softened.
3. Add garlic and Arborio rice and stir until the grains are well coated with oil and slightly toasted, about 3 minutes. Be careful not to burn the garlic!
4. Add wine (it can be cold) and stir until absorbed by the rice.
5. Begin adding the heated stock, one ladle-full at a time, allowing it to be absorbed by the rice, before adding more. When you run a fork across the bottom of the pan and it stay parted you know it has been absorbed enough.
6. Repeat the ladling and stirring frequently until the risotto is tender and creamy. The rice will be al dente – i.e. soft but not too mushy
7. Season with salt and pepper and add peas, parsley, butter and cheese. Mix vigorously for maximum creaminess.

Directions for Prawns
Heat oil and butter in sauté pan. When hot add prawns cooking about 2 minutes per side until bright red in color and the prawns have curled up in the pan. Add lime juice. Sauté another 30-60 seconds. Place on top of risotto. Enjoy.
From Pea & Parsley Risotto


Saturday, November 7, 2009

Immoral Chocolate-Peanut Butter Pudding

Sinful Pudding: withinthekitchen.blogspot.com

Immoral Chocolate-Peanut Butter Pudding

This is seriously good and decadent old-fashioned pudding. I combined two of my favorites – chocolate and peanut butter in this great dessert. The peanut butter flavour is subtle and lingers after each bite. You can also pour the pudding into a pre-made pie or graham shell to turn it into a cream pie.

My 5-year old and 3-year old had a great time helping me make this on the weekend. The best part, of course, was licking the spoons afterward!


Ingredients:
6 tablespoons plus 1/2 cup white sugar
6 tablespoons unsweetened cocoa powder
1/4 cup cornstarch
4 cups half-and-half
2 large eggs
4 large egg yolks
1/2 teaspoon salt
1 cup milk chocolate chips
½ cup peanut butter flavoured chips
4 tablespoons unsalted butter
1 tsp vanilla extract
4 tablespoons smooth peanut butter

Instructions:
  1. Sift together cocoa powder, 6 tablespoons sugar, and the cornstarch into a small bowl.
  2. Gradually whisk in 1 cup of the half-and-half; continue to whisk until smooth.
  3. In large bowl, whisk together the eggs and egg yolks.
  4. In medium saucepan, combine and stir together the remaining 1/2 cup sugar, 3 cups half-and-half, and salt.
  5. Set over medium heat and bring to a simmer.
  6. Whisk the cocoa mixture into the half-and-half mixture.
  7. Bring to a boil, whisking constantly.
  8. Lower the heat and cook, whisking constantly, until very thick, about 3 minutes.
  9. Remove from heat.
  10. Add a large spoonful of the hot cocoa cream mixture to the egg yolk mixture, whisking all the while. Add another spoonful, and then another. This will prevent the eggs from scrambling.
  11. Put saucepan back on low heat.
  12. Cook, whisking constantly, until the mixture just reaches a boil. This will ensure that the pudding sets properly.
  13. Remove from the heat and immediately add the chocolate and peanut butter chips, butter and 2 tbsp peanut butter. Stir until smooth.
  14. Stir in the vanilla.
  15. Spoon pudding into a medium-sized serving bowl or into 4-6 individual dishes.
  16. Microwave last two tablespoons of peanut butter for 10-15 seconds.
  17. Stir until melted.
  18. Drizzle over pudding.
  19. Cool to room temperature, then cover with plastic wrap and refrigerate until cold, at least 4 hours.
  20. Serve cold.

Thursday, November 5, 2009

Habit Forming Cinnamon-Sugared Nuts!

Christmas often brought with it these delightful sugared nuts. This recipe started with my Grandmother. It's easy and also makes a great Hostess gift during the Holidays...just be sure to make an extra batch for yourself.


From Collages


Ingredients

2 cups salted nuts mix (a cheap tin of mixed nuts of hazelnuts, almonds, cashews etc works well)
1 egg white, slightly beaten
5 tablespoons white sugar
4 tsp cinnamon
1 cup raisins or craisins


Method
  1. In a bowl, combine egg whites and nuts. Make nuts are well coated.
  2. Combine the sugar and cinnamon.
  3. Sprinkle sugar and cinnamon over nuts and again make sure nuts and spice are well coated.
  4. Spread in a single layer on a baking sheet.
  5. Bake at 325 degrees for 20 minutes. Stir once or twice while baking.
  6. Remove from oven and stir in raisins/craisins.
  7. Cool and put into container.

Monday, November 2, 2009

Potato and Pea Curry Wraps

From curry
I began making this recipe about 10 years ago. Unfortunately, I can't remember the book it is based on and now consider it a "family" recipe!

Make this and your kitchen will smell heavenly and you will impress your vegetarian friends! Serve this with mango chutney - either inside the wrap or on the side so you can spoon it on top with each bite. Definitely not for low carb diets! For those not familiar with garam masala - it's an Indian spice mix of cumin, coriander, cardamon, cloves and cinnamon.

Ingredients
1.5 lbs potatoes
2 tbsp vegetable oil
2 tsp mustard seeds
2 medium onions, chopped
4 cloves garlic, crushed
1 tbsp freshly grated ginger
1 tsp tumeric
1 tsp garam masala
1 tsp cumin
1/2 cayenne
1/2 tsp salt
1/2 water
1 cup peas
2 tbsp cilantro
4 large soft tortillas
mango chutney - optional (but really good)

What to do

  1. Cut potatoes into 1-inch cubes (don't peel them unless you want them that way).
  2. Heat oil in large skillet.
  3. Add mustard seeds and cook till they start to jump and pop.
  4. Add the onions, garlic and ginger. Cook with low heat till soft. Stir frequently.
  5. Add the tumeric, cayenne, cumin, garam masala, salt and potatoes.
  6. Stir for a minute or two until everything is nicely mixed.
  7. Add water. Stir. Cover.
  8. Simmer for 15-20 minutes until potatoes are cooked and tender.
  9. Add the peas, cover pan and cook for another 5 minutes or so.
  10. Mix in cilantro.
  11. I like to mash up the mixture just a little - but up to you!
  12. Wrap tortillas in foil and heat for 5-8 minutes in oven at 350 degrees. OR microwave for 10-20 seconds.
  13. Divide potato mixture into tortillas.
  14. Add some mango chutney and cilantro if desired inside the wrap or on the side.
  15. Wrap like a burrito. If you need instructions on wrapping look here:http://www.ehow.com/how_5327072_wrap-perfect-burrito.html
  16. Enjoy!


Sunday, November 1, 2009

Curried Macaroni and Cheese Casserole

From curried mac and cheese
What kid doesn't like mac and cheese?! Mine certainly love it. But let's face it - lots of us adults love it too! This recipe is based on one from Marie Nightengale, a Nova Scotian food editor. I've added more spice, more sauce, and more cheese! I love the fresh bread crumbs on top - yum.

Ingredients
3 cups uncooked macaroni
4 tbsp butter
4 tbsp flour
salt and pepper to taste
1 tsp curry powder(or more if you like)
1/2 tsp paprika
1 and 3/4 c - 2 cups milk (depending on how saucy you like it)
2 cups grated cheese (anything type that melts well will do)
3/4 cup soft, fresh bread crumbs
2 tbsp butter

How to Create it
From curried mac and cheese

1. Cook macaroni as stated on package.
2. In medium sauce pan melt butter.
3. Add flour, salt, pepper, paprika and curry. Stir for 3-4 minutes.
4. Gradually add milk. Stir until smooth and thickened.
5. Add 1 cup of shredded cheese and stir until melted.
6. Grease 8x8 pan. Add half of macaroni.
7. Cover macaroni with 1/2 of the melted cheese mixture.
8. Sprinkle with 1/4 cup grated cheese.
9. Layer last half of macaroni, cheese mixture and last 1/4 cup of grated cheese.
9. Melt 2 tbsp butter and mix with bread crumbs. Sprinkle over top of pan.

Bake at 375 degrees for 20 minutes.
Serves about 6.

From curried mac and cheese


Notes:
- also good if you add a layer of ground beef, bacon or chicken.
- this is not a "saucy" mac and cheese so if you prefer it that way make more sauce!

Tuesday, October 27, 2009

Sugar Cookies - Sweet Memories

From halloween sugar cookies 2009

My paternal grandmother, Olive, died when I was quite young so I have few real memories of her. The strongest, most significant "mem
ory" I have of her isn't a memory at all but rather a smell. The smell of sugar cookies. I can feel being in her kitchen and standing next to her while she baked them - I don't remember what she looked or the set up the kitchen but I have feelings of love, safety and joy when ever I smell these cookies. I hope you enjoy them.

Olive's Sugar Cookies
Ingredients:
  • 1/2 cup unsalted butter
  • 1/2 cup shortening
  • 1/2 cup white granulated sugar
  • 1/2 cup brown sugar
  • 1 egg
  • 1 tsp vanilla (I use McCormicks)
  • 2.5 cups flour
  • 1 tsp baking powder
  • 1 tsp baking soda
  • pinch of salt
What to do:
  • Preheat oven to 350 degrees F (190 degrees C).
  • Line baking sheets with parchment paper.
  • In bowl; whisk flour, baking powder, baking soda and salt to combine. Set aside.
  • In another large bowl beat butter and shortening
  • Beat in sugars until light and fairly fluffy
  • Beat in egg and vanilla.
  • Mix in flour mixture.
  • Divide dough in half; flatten each slightly.
  • Wrap in plastic wrap and refrigerate for at least 1 hour or up to 24 hours.
  • On lightly floured surface, roll out dough, 1 piece at a time, to 1/4-inch (5 mm) thickness
  • Using 3-inch (8 cm) cookie cutters, cut out shapes.
  • Press scraps together to reroll.
  • Bake in centre of oven for about 12-14 minutes or until light golden on bottom and edges.
  • Let cool for 1 minute on baking sheets.
  • Transfer to racks; let cool completely.
  • Decorate as you like.

Sunday, October 25, 2009

Really Good Ribs!


Saucy and Spicy Baby Back Ribs

Not only do these ribs get massaged with a spicy dry rub, they are lathered and pampered up with BBQ sauce!

You will need:

Dry Rub

2 Tbsp smoked paprika

1.5 Tbsp chipotle powder

1/2 teaspoon cayenne pepper

1 Tbsp cumin

1 tsp celery seed

1 tsp garlic powder

1 tsp salt

1/2 tsp ground pepper


BBQ Sauce

We use a local bottled variety - any will do.

Meat

2 large racks of baby back ribs.

What to do:

1. Preheat oven to 400 degrees.

2. Line a large rimmed baking pan with foil.

3. Mix the dry rub spices together in a small bowl and set aside.

4. Rinse and pat the ribs dry.

5. Remove the paper thin membrane covering the bone side of the ribs. This is important otherwise you will end up with tough meat.

6. Put the rub all over the ribs and place on baking sheet. (If time permits, let sit in refrigerator for 2-3 hours.)

7. Cover with foil and place ribs in bottom third of oven for 1hr and 45 minutes minutes.

8. Ribs can be prepared to this point and refrigerated till ready. (very convenient for make ahead meals)

9. When ready to grill use medium heat.

10. Cut rib racks in 1/2 or in thirds.

11.Put fat side down and baste with sauce. Grill for 5 minutes with lid closed.

12. Rebaste. do not turn. Grill for 2 minutes.

13. Flip. Baste. Close lid again for 4 minutes.

14. Baste again if you like them saucy.

15. Plate and enjoy!


Good side options: Baked beans, salad, corn on the cob

Wednesday, October 21, 2009

Burstin' Blueberry Cake

Burstin' Blueberry Cake
From Burstin' Blueberry Cake

My next-door neighbour, Shirley, was not only our babysitter and mother of 6 kids, she also made a mean blueberry cake. I don't remember the first time I had this cake but I remember the smell, I remember sitting at her table eating it with the other kids. I don't remember the conversations we had but I do remember the laughter and the lingering delicious taste of this old-fashioned cake.
From Burstin' Blueberry Cake


Ingredients:
1/2 cup shortening
1 cup sugar
2 eggs
1 tsp vanilla
¼ tsp salt
2 cups all purpose flour
3 tsp baking powder
¾ cup milk
1 cup blueberries - fresh or frozen will work.

Preheat oven to 350 degrees.
Grease 9x9 pan.

Method:

Cream shortening and sugar together until well combines. Add eggs, one at a time. Add vanilla.

Sift flour, salt, and baking powder in another bowl.

Add 1/3 of sifted mixture to creamed mixture. Mix until blended. Add 1/2 of milk and mix until just incorporated. Mix in another 1/3 of dry ingredients and then mix in milk and then the last of the dry ingredients. Fold in blueberries.

Pour batter into pan and bake for 40 minutes or until a toothpick comes out clean.

Tips:
- if using frozen berries, tossing berries in a bit of powdered sugar before adding to batter will cut down on colour bleed.
- sprinkling cake with powdered sugar is a nice option.
- I haven't tried it but I pretty sure you can substitute the shortening with butter, if desired.

- In picture above I substituted same amount almond extract for the vanilla and sprinkled with toasted almonds. mmmm.

- 9 x 13 pan can be used. bake for 30 minutes.

Monday, October 19, 2009

Cold Season = Roasted Tomato & Basil Soup

Roasted Tomato & Basil Soup

Although my three year old son doesn't like to share his toys, he's more than willing to share his cold with me. When I get a cold all I want is soup...tomato soup.

So off to the kitchen I went. I couldn't handle anything too complicated tonight so I made up a batch of "Roasted Tomato and Basil Soup."

First I drained 2 cans of whole tomatoes - the juice went into a big pot and the tomatoes went onto a baking sheet (along with 2 fresh ones because they were in my veggie bowl). I roasted them for 25 minutes at 425 degrees. (Warning: when I took them out of the oven the steam set my smoke detectors off!) I also added a head of garlic to roast with the tomatoes.

While they were roasting, I sauteed a carrot, stalk of celery and a half of a red onion in a little oil. I also cut up about 1/3 to 1/2 a cup of fresh basil - I love basil so the more the better.


All of this went into the big pot with the tomato juice. I added two cups of chicken stock but veggie stalk or probably even tomato juice would work. The roasted tomatoes and garlic were added to the mix along with a pinch of sage and thyme and about a quarter cup of olive oil.

I used my hand blender to puree the whole thing. Now I like this soup with a thick/slightly chunky texture but if that isn't your style, it could be put through a sieve too. You could also add milk or cream if you wanted too. I like it without.

The soup will be even better tomorrow but it hit the spot tonight - my cold is still here but my stomach is happy!

Wednesday, October 14, 2009

Thanksgiving a la Julia

I have to admit Julia Child was not part of my youth. I did not watch her TV shows and my Mom didn't have any of her cookbooks. But thankfully I love Meryl Streep and went to Julie and Julia a few weeks ago. I LOVED that movie! In fact, I must admit that I have seen it twice - once with a friend, the 2nd time I took my Mom. I laughed, I cried and I went out and bought not only Julia's book upon which the movie was based but also her iconic Mastering the Art of French Cooking.

The cookbook is a little intimidating to me. I, like my mom, am a baker (amateur only) and cakes, pies and cookies are in my comfort zone. Braised anything, is not. But I am determined to learn how to cook and I have chosen Julia as my master.

The first event that was Julia worthy I figured was Canadian Thanksgiving. My husband insisted he did not want turkey. To look for alternatives I opened Julia's book of treasures. I wanted something we could carve so soups, stews etc were out. However, Beef a la mode was in! Besides, I liked telling my husband and kids we were having it only to see the horror as they translated that to mean beef and ice cream. Ha! To go along with it I went along with her suggestions of brown braised onions and potatoes. I passed on the carrots because when I did a trial version they were to mushy for our tastes. For dessert, I decided on a gratin of apples. I was also going to try her lemon almond tart but two days before the big day I got stressed out and ixnayed it. Instead, I chose a non-Julia recipe for "pumpkin whip" that my 5 year old and 3 year old could be in charge of making.

The day before ...
The day before the dinner for 8 was to happen I had to get the ingredients for everything and bake the apple dessert and start marinating the beef. It also meant buying a dutch oven and two new skillets!

I went to a local farmers market for the veggies - is it coincidence that the fingerling potatoes that were only $2.50/lb a few weeks before the movie came out are now billed as "quintessentially french" potatoes and cost $4/lb now? hmmm. I bought them anyways. I also bought the apples.

At the local butchers my husband picked out the baron of beef (the butchers felt for him since they figured if the meal went wrong, I would blame it on the piece of beef he picked...hmmm they were probably right) and bought the butter (lots of butter) and the wine needed for the marinade (an entire bottle!).


Let's start with dessert...

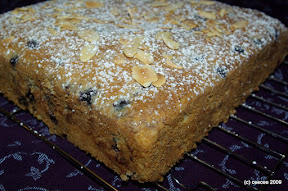
Later that afternoon the kids and hubby were sent out of the house so I could start with Julia's lesson on gratin of apples. Translated btw way I think should really be titled "fried butter with apples cake".

Basically, you fry or sauté 2.5lbs of golden delicious apples in butter (nothing else) till they are golden, soft but still look like apples. You layer the apples in a baking dish as you sauté them.


Plum jam and rum are mixed together and added to the apple mix. After that, you make the "cake" top. I baked it for 25 minutes, sprinkle powdered sugar on it and then bake it for another 25 minutes. Voila! Cool it and stick it in the fridge for 24 hours so the flavours can get to know each other before the entire masterpiece is wolfed down by guests :)


Bring out the wine...

Beef a la mode needs to be marinated for up to 24 hours before being cooked. The marinade consists of a bottle of red wine, brandy, oil, herbs, a cup each of carrots, onions and celery, garlic, salt and pepper. I put half the veggies in the bottom of the dutch oven and then the beef and then the other half and the herbs and garlic. The liquid gets poured on top.


Let's talk about the beef for a second - my husband did exactly what I requested - brought home 5.5 lbs of meat! Too bad I didn't think about the size of my pot - it barely fit!! It must have been quite a hilarious sight to see - 2 grown people trying to shove a big piece of cow into a too small pot. Anyways... off it went into the fridge. Julia tells us to baste it every hour or so. I basted it about 6 times in 24 hours.

The Big Day...


So for beef, I took it out of the fridge and the marinade about 45 minutes before it went in the oven. The idea is to drip dry it a bit before I took paper towels and dried it even more. Julia says the beef must be really dry in order for it to brown properly. I used canola oil and my biggest skillet to brown the beef. It took about 10 minutes to do and it was definitely brown so I guess Julia was right about drying it!

After that it went back into the dutch oven with the marinade and I boiled it til the marinade was about half of its original amount. Then I poured beef broth (which I bought from a local market) until it reached the 2/3 mark on the beef. PS once the beef browns it is even HARDER to put that hunk of meat back in the dutch oven! Anyways, I was supposed to skim the mixture once it was boiling but I forgot and stuck it unskimmed into the oven at 325 degrees (it was supposed to be 350 but it seemed to hot).


Julia says you cannot overcook this beef - I think she is wrong on that cause even though I cooked it for the recommended time, it was a bit dry for my tastes though still very tender and with the gravy it tastes amazing.

While the meat was doing it's thing in the oven I made the brown braised onions which are simple to make, though not low cal. The hardest part is skinning those little suckers. I used white yellow and purple pearl onions. Once skinned they are sauteed in butter and then simmered in beef broth. The best thing is that I made them and just put them aside to just before serving when I put them in the sauce/gravy.


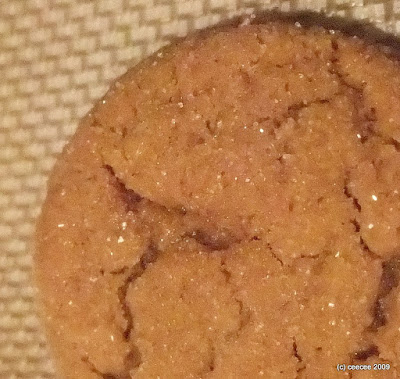
After the onions there was about an hour to clean up and set the kids up to make pumpkin whip which is just a mix of butterscotch pudding, milk, pumpkin and whip cream. The kids then put them into little pre-made tart shells. The best thing about the 20 minutes this recipe took to put together was the lack of fighting and gobs of cooperation that went on between the kids...perhaps the best part of the whole experience :)

Next, the carrots were cut up and put in the steamer ready to go once the beef came out of the oven.


The beef a la mode came out after 2.5 hours but honestly I think 2 hours would have been better. The beef was put on a platter and then the juices and veggies were put through a sieve and all the juice possible was squeezed out and put back into the dutch oven. I boiled down a bit and then I added some cornstarch to a bit of the hot liquid and then put back into the bigger pot. Within 5 or 10 minutes the thickening takes hold and voila gravy/sauce/nectar of the gods is born.

Honestly my husband does not like gravy - but he LOVED this. It is that good.

Carrots went on and potatoes were next. The potatoes were also Julia's. I used the expensive fingerling variety and peeled them without washing them as instructed by Julia. Then they went into a butter and oil mixture and basically pan fried until nicely browned on all sides. Once browned, I put the lid on the skillet and let them cook at a lower heat for another fifteen minutes. So again like the onions the recipe is simple once peeled which is the only time consuming part.


The beef was carved up and placed on the platter. The carrots were added to the sauce along with the onions. Then they were taken out and put around the roast along with the potatoes. Sauce went on the beef and the rest in a boat.

Honestly, we thought we'd have a tonne of left overs...boy, were we wrong. A couple pieces of meat, a few potatoes and maybe one onion was left along with a piece of the apple dessert. Judged on that alone, I'd say the meal was a huge success. The meal also seemed to me to be easier to put together than past turkey thanksgiving dinners. I actually had time to sit down with a glass of wine with our guests before dinner. The last few minutes was, of course, a flurry of activity but not too bad. I really liked putting things on one platter and it cut down on a few dishes!

The entire evening from the meal to the company was fantastic!

I hope your Thanksgiving was fabulous too!