Thursday, November 26, 2009

Deconstructed Peanut Butter and Banana Sandwich

From deconstructed peanut butter and banana
I have to admit one trend I have not enjoyed in the world of food is deconstruction!  I know, I know some say deconstruction isn't just about taking a dish apart but putting the pieces into a new form.  But really, if I want a salad, I don't want to have to cut up the head of lettuce myself, mix the dressing and make my own croutons...I'm paying for someone to make my dinner for me and serve it so all I have to do is eat it....otherwise I can stay at home. I'm sure there are amazing deconstructed dishes out there, it's just not my thing. And the new thing of deconstructed drinks!??! Don't get me started!

Anyhoo, I told you this because I am admitting that I made a deconstructed meal the other night. My 5 year old daughter is usually a good eater as long as it doesn't involve any form of a potato (not even a french fry!). But, of course, the one night I am beyond tired and slightly cranky she decides that she wants nothing to do with the meal we had planned.
From deconstructed peanut butter and banana
I decided to be nice and I offered to make her a pb and j sandwich for dinner instead ... she refused. Normally, that would have been my final offer figuring when she got hungry enough she'd come around but I decided to try a different tactic. I cut up a banana, melted some peanut butter in a small bowl, cut up a tortilla and added a toothpick... stuck it on a plate and offered up a "deconstructed peanut butter and banana sample platter"... I've learned that if I don't call it "dinner" my kids are more interested in it ... sometimes. I am proud to say it worked! The plate was wiped clean, there were no tantrums (from me or her), and bellies were full. I didn't cure a disease, find a lost civilization or write a best seller but I did get my daughter to eat a nutritious dinner... a success in my book!

Tuesday, November 24, 2009

Brown Sugar & Walnut Coffee Cake

Of all the baking I do, this is by far the most requested recipe. It is my Mom's recipe. It is the perfect coffee cake - not too cakey, but not dry. As my husband says, the cake is not so sweet or fluffy that it makes you feel guilty about having it for breakfast! The brown sugar topping that is scattered in the middle and the top is delicious and nutty. In all honesty, I often double the topping because you can't have too much of it! The icing drizzled on top adds the perfect extra sweetness to this amazing coffee cake.

From brown sugared coffee cake
Topping:
1/2 cup brown sugar
2 tbsp flour
2 tsp cinnamon
2 tbsp melted butter
1/2 walnuts

Mix all of the above together and let stand.

Batter:
1/4 cup buttter
3/4 cup whte sugar
3/4 cup milk
1 egg slightly beaten
1 tsp vanilla
1.5 cups flour
2 tsp baking powder
1/2 tsp salt

Icing:
1/4 cup commercially prepared icing

Cake:
Cream butter and sugar for three minutes.
Add egg and vanilla.
In another bowl sift or whick together flour, baking powder and salt.
Add sifted ingredients, alternately with milk (3 flour: 2 milk) and mix with each addition..
Put 1/2 batter into greased tube pan.
Add half of topping.
Add rest of batter.
Add rest of topping spreading evenly.

Bake at 350 degrees for 30 minutes or until toothpick comes out clean.
Cool cake 10 minutes, remove from pan and flip so topping side faces up.
Ice while still warm by microwaving it for 10 seconds and then drizzling over cake (I know commercially prepared icing will make some of you revolt but seriously after years of making this cake it is exactly what it needs).

Wednesday, November 18, 2009

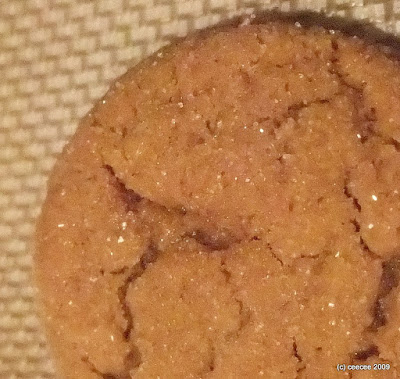
Soft and Chewy Ginger Snaps or Is My Mother a Liar?

From Ginger Snaps
Is my mother a liar? That is the life altering question I am pondering tonight. You see my Mom makes the best ginger snaps I have ever had the pleasure of eating in my life. They are encrusted in a delicate sugar coating, and when my teeth sink into the body of the cookie they are met with a soft and yielding cookie that is sweet and spicy and full-bodied. I love these cookies.  But these cookies are at the root of the question tonight - is my mother a liar?

You see, I wanted to look into the history of the ginger snap so I googled it, of course. PS btw, what the heck did we do before the ability to google? I have a love/hate relationship with googling - but that will have to wait for another blogging day. Anyways, I googled "ginger snaps". The first definition I see is "traditionally, the cookies are very crispy, so that they make a snapping noise when they are bitten into." Now do you see the problem?? If not, read the first paragraph again! The cookie I have viewed as the quintessential ginger snap are SOFT!! There is no "snapping" noise! There is no sound except for a gutteral "mmmm" coming from somewhere within me! And if this is true, what other life shattering lies has my mom told me... am I not the most beautiful girl in the world?? Is it possible I don't need an extra ten pounds on my body just in case I get sick?? Is my singing voice not up there with Celine Dion's?? Could my mother possibly be deceiving me in these areas too?? Oh the horror of it all!

It's too much to deal with tonight. I have decided that somewhere in the world ginger snaps were named ginger snaps because they are snapped up as soon as they are baked! That's my story and I'm sticking to it. Most importantly, it means my Mom is not a liar and I don't have to lose 10lbs, stop singing or start saving for a face lift. Phew. And, in case you are interested, here is my mom's recipe for her amazing, aptly named Ginger Snaps... :)
From Ginger Snaps

Ingredients
3/4 cup butter
1 cup white sugar
1 egg
1/2 cup molasses
2.5 cups flour
2 tsp baking soda
2 tsp ginger
1 tsp cinnamon
3/4 tsp salt

extra granulated sugar in bowl for dipping cookies
From Ginger Snaps
Method
1. Cream butter and 1 cup sugar well.
2. Beat in egg.
3. Mix in molasses.
4. In another bowl, stir together flour, baking soda, ginger, cinnamon, and salt.
5. Add to the creamed mixture and mix well.
6. Shape into 1 inch balls.
7. Roll in sugar and on baking sheet.
8. Bake at 350 degrees for 10-12 minutes.

Makes about 4 dozen cookies.

Saturday, November 14, 2009

Kitchen Sink Stuffed Peppers

From stuffed peppers
Saturday night and the kids are fed and in bed by 6:30pm - whoop! That leaves a large and important question, "What are we having for dinner?" The answer: kitchen sink stuffed peppers. Yum!

No recipe tonight just a cleaning out of the fridge and throwing things in a pan. Ground beef, a white onion, a big leek, 4 cloves of minced garlic, a couple of teaspoons of freshly grated ginger, some chopped, rather limp carrots, frozen spinach, and spices including celery seed, curry powder, salt, pepper, cayenne, and thyme. All of this went into the pan and sauteed until done.

While that was going on, I also cooked up a pot of of basmati rice which went into the saute pan when done.

Three red peppers were cleaned and cut. For a topping, I mixed some feta cheese, a handful of walnuts, and some breadcrumbs together with three tablespoons of melted butter.

After a half an hour or so in the oven (375 degrees) it was dinner time! Happy Saturday to all and to all a goodnight!
From stuffed peppers

Friday, November 13, 2009

Parmesan and Pea Risotto with Lime-Butter Prawns

From Pea & Parsley Risotto
Let me begin with a disclaimer: I am in no way Italian - unless there are a few secrets in my family there is not a drop of Italian blood in me. I did not have Italian neighbours and it wasn't until I was in my 20's that I had a friend who was of Italian heritage. So really - I have little experience to tell you that this is what risotto should look like or taste like ... but I do know I love this dish ... creamy, aromatic and delicious.

The basic recipe is from Micheal Smith who is a Canadian Chef. I have been a fan of his for years but even more so after he published a book without a lot of direction. Sounds crazy but he thinks you should cook with your heart and senses... a go with the flow kind of approach. To check out this great chef and his book go here http://www.chefmichaelsmith.ca/en/home/default.aspx

To his basic recipe I added lime & butter prawns, more cheese, more garlic and used less broth than recommended. Try it with your own tweaks and favorite flavours - you won't be disappointed.

Parmesan and Pea Risotto with Lime-Butter Prawns
Ingredients
From Pea & Parsley Risotto

• 6-8 cups chicken stock – I used homemade
• 1 onion, peeled and chopped
• 1 leek, sliced
• 1 shallot
• 3 tbsp olive oil
• 6 cloves garlic, peeled and minced
• 2 cups Arborio rice
• 1 cup white wine
• 1 cup frozen peas
• 1 handful chopped parsley
• 1 cup grated freshly Parmesan cheese
• 1 tbsp butter
• Salt and pepper
• 10-20 prawns
• ¼ c lime juice
• 2 tbsp butter
• 1 tbsp oil

Directions For Risotto

1. Heat chicken stock in a saucepan. It has to be very hot.
2. In another medium saucepan, sauté the 3 kinds of onions with the olive oil over medium high heat until softened.
3. Add garlic and Arborio rice and stir until the grains are well coated with oil and slightly toasted, about 3 minutes. Be careful not to burn the garlic!
4. Add wine (it can be cold) and stir until absorbed by the rice.
5. Begin adding the heated stock, one ladle-full at a time, allowing it to be absorbed by the rice, before adding more. When you run a fork across the bottom of the pan and it stay parted you know it has been absorbed enough.
6. Repeat the ladling and stirring frequently until the risotto is tender and creamy. The rice will be al dente – i.e. soft but not too mushy
7. Season with salt and pepper and add peas, parsley, butter and cheese. Mix vigorously for maximum creaminess.

Directions for Prawns
Heat oil and butter in sauté pan. When hot add prawns cooking about 2 minutes per side until bright red in color and the prawns have curled up in the pan. Add lime juice. Sauté another 30-60 seconds. Place on top of risotto. Enjoy.
From Pea & Parsley Risotto


Saturday, November 7, 2009

Immoral Chocolate-Peanut Butter Pudding

Sinful Pudding: withinthekitchen.blogspot.com

Immoral Chocolate-Peanut Butter Pudding

This is seriously good and decadent old-fashioned pudding. I combined two of my favorites – chocolate and peanut butter in this great dessert. The peanut butter flavour is subtle and lingers after each bite. You can also pour the pudding into a pre-made pie or graham shell to turn it into a cream pie.

My 5-year old and 3-year old had a great time helping me make this on the weekend. The best part, of course, was licking the spoons afterward!


Ingredients:
6 tablespoons plus 1/2 cup white sugar
6 tablespoons unsweetened cocoa powder
1/4 cup cornstarch
4 cups half-and-half
2 large eggs
4 large egg yolks
1/2 teaspoon salt
1 cup milk chocolate chips
½ cup peanut butter flavoured chips
4 tablespoons unsalted butter
1 tsp vanilla extract
4 tablespoons smooth peanut butter

Instructions:
  1. Sift together cocoa powder, 6 tablespoons sugar, and the cornstarch into a small bowl.
  2. Gradually whisk in 1 cup of the half-and-half; continue to whisk until smooth.
  3. In large bowl, whisk together the eggs and egg yolks.
  4. In medium saucepan, combine and stir together the remaining 1/2 cup sugar, 3 cups half-and-half, and salt.
  5. Set over medium heat and bring to a simmer.
  6. Whisk the cocoa mixture into the half-and-half mixture.
  7. Bring to a boil, whisking constantly.
  8. Lower the heat and cook, whisking constantly, until very thick, about 3 minutes.
  9. Remove from heat.
  10. Add a large spoonful of the hot cocoa cream mixture to the egg yolk mixture, whisking all the while. Add another spoonful, and then another. This will prevent the eggs from scrambling.
  11. Put saucepan back on low heat.
  12. Cook, whisking constantly, until the mixture just reaches a boil. This will ensure that the pudding sets properly.
  13. Remove from the heat and immediately add the chocolate and peanut butter chips, butter and 2 tbsp peanut butter. Stir until smooth.
  14. Stir in the vanilla.
  15. Spoon pudding into a medium-sized serving bowl or into 4-6 individual dishes.
  16. Microwave last two tablespoons of peanut butter for 10-15 seconds.
  17. Stir until melted.
  18. Drizzle over pudding.
  19. Cool to room temperature, then cover with plastic wrap and refrigerate until cold, at least 4 hours.
  20. Serve cold.

Thursday, November 5, 2009

Habit Forming Cinnamon-Sugared Nuts!

Christmas often brought with it these delightful sugared nuts. This recipe started with my Grandmother. It's easy and also makes a great Hostess gift during the Holidays...just be sure to make an extra batch for yourself.


From Collages


Ingredients

2 cups salted nuts mix (a cheap tin of mixed nuts of hazelnuts, almonds, cashews etc works well)
1 egg white, slightly beaten
5 tablespoons white sugar
4 tsp cinnamon
1 cup raisins or craisins


Method
  1. In a bowl, combine egg whites and nuts. Make nuts are well coated.
  2. Combine the sugar and cinnamon.
  3. Sprinkle sugar and cinnamon over nuts and again make sure nuts and spice are well coated.
  4. Spread in a single layer on a baking sheet.
  5. Bake at 325 degrees for 20 minutes. Stir once or twice while baking.
  6. Remove from oven and stir in raisins/craisins.
  7. Cool and put into container.

Monday, November 2, 2009

Potato and Pea Curry Wraps

From curry
I began making this recipe about 10 years ago. Unfortunately, I can't remember the book it is based on and now consider it a "family" recipe!

Make this and your kitchen will smell heavenly and you will impress your vegetarian friends! Serve this with mango chutney - either inside the wrap or on the side so you can spoon it on top with each bite. Definitely not for low carb diets! For those not familiar with garam masala - it's an Indian spice mix of cumin, coriander, cardamon, cloves and cinnamon.

Ingredients
1.5 lbs potatoes
2 tbsp vegetable oil
2 tsp mustard seeds
2 medium onions, chopped
4 cloves garlic, crushed
1 tbsp freshly grated ginger
1 tsp tumeric
1 tsp garam masala
1 tsp cumin
1/2 cayenne
1/2 tsp salt
1/2 water
1 cup peas
2 tbsp cilantro
4 large soft tortillas
mango chutney - optional (but really good)

What to do

  1. Cut potatoes into 1-inch cubes (don't peel them unless you want them that way).
  2. Heat oil in large skillet.
  3. Add mustard seeds and cook till they start to jump and pop.
  4. Add the onions, garlic and ginger. Cook with low heat till soft. Stir frequently.
  5. Add the tumeric, cayenne, cumin, garam masala, salt and potatoes.
  6. Stir for a minute or two until everything is nicely mixed.
  7. Add water. Stir. Cover.
  8. Simmer for 15-20 minutes until potatoes are cooked and tender.
  9. Add the peas, cover pan and cook for another 5 minutes or so.
  10. Mix in cilantro.
  11. I like to mash up the mixture just a little - but up to you!
  12. Wrap tortillas in foil and heat for 5-8 minutes in oven at 350 degrees. OR microwave for 10-20 seconds.
  13. Divide potato mixture into tortillas.
  14. Add some mango chutney and cilantro if desired inside the wrap or on the side.
  15. Wrap like a burrito. If you need instructions on wrapping look here:http://www.ehow.com/how_5327072_wrap-perfect-burrito.html
  16. Enjoy!


Sunday, November 1, 2009

Curried Macaroni and Cheese Casserole

From curried mac and cheese
What kid doesn't like mac and cheese?! Mine certainly love it. But let's face it - lots of us adults love it too! This recipe is based on one from Marie Nightengale, a Nova Scotian food editor. I've added more spice, more sauce, and more cheese! I love the fresh bread crumbs on top - yum.

Ingredients
3 cups uncooked macaroni
4 tbsp butter
4 tbsp flour
salt and pepper to taste
1 tsp curry powder(or more if you like)
1/2 tsp paprika
1 and 3/4 c - 2 cups milk (depending on how saucy you like it)
2 cups grated cheese (anything type that melts well will do)
3/4 cup soft, fresh bread crumbs
2 tbsp butter

How to Create it
From curried mac and cheese

1. Cook macaroni as stated on package.
2. In medium sauce pan melt butter.
3. Add flour, salt, pepper, paprika and curry. Stir for 3-4 minutes.
4. Gradually add milk. Stir until smooth and thickened.
5. Add 1 cup of shredded cheese and stir until melted.
6. Grease 8x8 pan. Add half of macaroni.
7. Cover macaroni with 1/2 of the melted cheese mixture.
8. Sprinkle with 1/4 cup grated cheese.
9. Layer last half of macaroni, cheese mixture and last 1/4 cup of grated cheese.
9. Melt 2 tbsp butter and mix with bread crumbs. Sprinkle over top of pan.

Bake at 375 degrees for 20 minutes.
Serves about 6.

From curried mac and cheese


Notes:
- also good if you add a layer of ground beef, bacon or chicken.
- this is not a "saucy" mac and cheese so if you prefer it that way make more sauce!