The Daring Bakers go retro this month! Thanks to one of our very talented non-blogging members, Sarah, the Daring Bakers were challenged to make Croissants using a recipe from the Queen of French Cooking, none other than Julia Child!
I love freshly baked bread...the taste, the smell, the feel of it in your mouth. Mmmm. I have made homemade bread before but never croissants. I must say it was a long process. In fact, it took three days from the day I started until the final baking! Was it worth it? Well, yes in the sense that I can cross it off my baking to do list. But to be honest, next time I'd rather fly to Paris and enjoy an authentic croissant in a small, romantic French cafe!
I used a recipe from Fine Cooking (so, I guess, I technically failed the challenge) and not Julia's, because Fine Cooking's was super easy to follow and well laid out. I also kept it simple and chose not to add chocolate or anything else to fancy it up...sometimes simple is best!
Tuesday, September 27, 2011
Friday, September 23, 2011
Nut Free Pumpkin Seed Granola
Fall is here and Halloween is just around the corner so, of course, I have pumpkin on the brain. When I came across pumpkin seeds at the grocery store, I knew a big batch of granola was in order. This version is nut free so the kids can take it to school for a healthy and energy filled snack. I also had a bag of dried blueberries so I threw those in too. That's the great thing about granola - pretty much anything goes! Note: The dried fruit goes in after baking so it doesn't burn.
Ingredients
3/4 c canola oil
1 c maple syrup
2 tsp vanilla
1 tsp chocolate extract (optional)
2 tbsp cinnamon
1 tsp ground nutmeg
2 tsp ground ginger
1 tsp salt
7 cups rolled oats
1 cup wheat germ
1 cup wheat bran
1 cup milled flax
1 cup dried blueberries
1/2 cup raisins
1/2 cup dried apricots
1 cup raw pumpkins seeds
What to do
- Preheat oven to 350 degrees F.
- In medium sized pot combine oil, maple syrup,vanilla, chocolate essence, cinnamon, nutmeg, and ginger.
- Stir over medium heat until just simmering and remove from heat. Watch carefully and be careful not to burn yourself.
- Combine oats, wheat germ, bran and flax with salt and pumpkin seeds.
- Pour oil mixture over oats and stir until well combined.
- Spread granola on two large cookie sheets.
- Bake for 40-50 minutes until golden. While baking stir granola every ten minutes to ensure even baking.
- Remove from oven and cool completely.
- Place in large bowl.
- Add dried fruits and combine.
- Store in air tight containers.
Monday, September 19, 2011
DIY Fruit Leather
I'm not a big fruit leather fan, but my kids love it! So, when I made a big batch of apple-pear sauce, I put some aside for this recipe. After the sauce was made, all I had to do was pour it in a thin layer and dry it out. The drying process is a bit long as its done at a low temperature but what else is there to do on a rainy fall afternoon?
My daugther says the store bought variety is sweeter but she liked the cinnamon flavour in this version so in her opinion it's better than the prepackaged variety.
Ingredients
- 3 cups apple sauce (homemade or store bought)
- 1 tsp cinnamon
- 1/4 tsp nutmeg
- 1 tsp vanilla
What to do
- Preheat the oven to 170 degrees F - if your oven doesn't go that low 200 degrees F is fine.
- Cover a baking sheet with a silpat.
- If using commercially prepared sauce, combine it wiht spices and vanilla in a large bowl.
- Spread evenly over silpat (up to 1/4 inch thick). Place the pan in middle rack of oven.
- Bake for 5 to 7 hours. Fruit is dry when the surface is no longer tacky, it's smooth.
- Cool completely.
- Remove fruit leather from pan and silpat.
- Cut into strips or shapes with cookie cutters.
- Roll the pieces with plastic wrap or parchment.
- Store in an airtight jar.
Wednesday, September 14, 2011
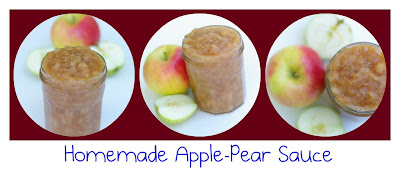
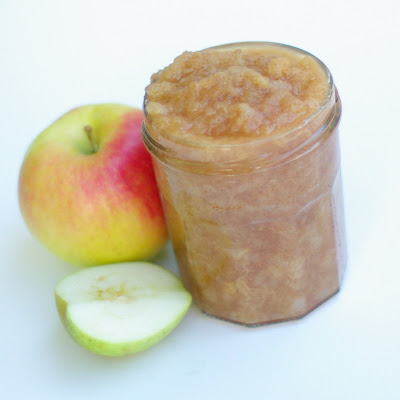
Apple-Pear Sauce

Have you ever made your own apple sauce? If not, put it on your to do list and DO IT! Homemade sauce is infinitely better than anything you buy at the grocery store. Even better, you can make it anyway you like - with sugar, without sugar, smooth, chunky, flavoured with cinnamon, nutmeg, cloves, vanilla ...or not! It really doesn't take long and it goes with so many things. Try your own sauce on top of oatmeal, ice cream, in smoothies, on its own, with pork or with french fries (sounds crazy, I know).
I made a big batch of apple and pear sauce the night before last and it's almost gone. The kids have had it for dessert and with their breakfast! I also made extra so I could make some fruit leather which I will post soon.
Side story: My son started kindergarten last week at a school where he didn't know anyone in his grade. I was a little worried about him making friends as he can be a little shy. I'm happy to report that last night he told me he found a new buddy. We had been coaching him to go up to kids he wanted to befriend and ask them to play at recess. When he was telling me about his new friend, he exclaimed with delight that he didn't have to go up to him because the boy came up and asked if he wanted to be friends! So cute. Even cuter ...when I asked him his new friend's name his response was "I don't know, I forgot to ask ...but we're still friends!!" Don't you just love kids and how they think?!

Apple Pear Sauce
Ingredients
4 medium to large apples
5 Bartlett pears
1 tsp vanilla
1/2 c water
1/8c - 1/4 c brown sugar (depending on sweetness of your fruit)
2 tsp cinnamon
1/2 tsp ground ginger
1/4 tsp nutmeg
What to do
- Peel, core and chopped apples and pears into large chunks.
- Place in large pot or dutch oven.
- Add sugar, water, vanilla and spices.
- Bring to boil over medium heat.
- Reduce heat and simmer for 25 minutes.
- For chunky sauce, mash with a hand held masher.
- For a smooth sauce puree in a blender AFTER if has cooled or use an immersion blender.
- Refrigerate and use within 5-7 days.

Saturday, September 10, 2011
Butterfly Birthday Cake and Vanilla Frosting Recipe
My daughter turned 7 a few weeks ago. I swear we just brought her home from the hospital yesterday! I'm not sure where time goes but my daugther has certainly made the most of it. I don't think a minute goes by without her posing a question about something she's seen, heard or imagined! But her curiosity
has helped her grow.
I love this time of her life - over the past year she's learned to read chapter books, to write and create stories, learned to ride a bike, almost "mastered" water skiing, tells terrible knock-knock jokes, tries to be nice to her little brother ("tries" is the key word), and has accomplished so much more that it would take pages to list. Of course, she's still my little girl and I don't want her to grow up too fast but I am very proud of her (well...except maybe the time she spilled nail polish all over her bed trying to paint her nails).
For her birthday, she wanted a butterfly theme...butterfly cake, butterfly decorations, butterfly shaped sandwiches etc. And homemade strawberry lemonade, tea sandwiches and watermelon - she leaves nothing to chance! She also wanted outdoor fun - bobbing for apples, the limbo, potato sack races, three-legged contest and more!
This is the cake. It's a 9-inch layer cake and a 6-inch layer cake stacked and iced with buttercream. I forgot to take a picture of the inside of the cake which was coloured in pink and purple swirls. I searched high and low for edible rice paper butterflys and finally found great ones on ETSY. They arrived in time even though a postal strike had just ended and I LOVE them. Take a look at her site as she also offers other shapes. The kids adored them and couldn't believe they could actually eat them!
This recipe has been used in my family for a long time but I also found a similar recipe on Martha's site recently! Although basically just butter and sugar, it doesn't taste too sweet or heavy. You can also add colour gels if you want to colour your frosting.
Easy Vanilla Frosting for 2 dozen cupcakes
3-1/2 c - 4 c powdered sugar, sifted
2 c unsalted butter, room temperaturepinch of salt
2 tsp vanilla
1/8c - 1/4 c milk
| Edible butterflys, candy flowers and pastel icing make a seven year old VERY happy. |
What to do
- In a large bowl (preferably a stand alone mixer) beat butter until light and creamy.
- In half cup increments add sugar and beat until combined.
- Add extract and beat until combined.
- Depending on the brand of butter I use, the amount of milk I need varies. Start with 1/8 c and add more if needed. Beat the mixture at medium speed until the frosting is perfectly smooth and creamy. I usually beat it for about 5 minutes or so.
- Add colour, if required and beat until colour is even.
- Use imediately or refrigerate (if refrigerating bring back to room temperature before using).
Saturday, September 3, 2011
Irish Cream Frozen Coffee
Summer is almost over but that's no reason to bring out the hot chocolate just yet! This blended frozen drink is great to sip while you remember the lazy, hazy days of the past few months. You can also skip the irish cream if you want.
Ingredients
- 1-1/2 c ice
- 2 oz of espresso
- 3/4 c non-fat milk
- 1/4 c irish cream (I use Bailey's)
- optional - whipped cream and chocolate sauce
What to do
- Blend all the ingredients a blender until ice is crushed and a milk shake consistency is reached.
- Pour into a tall glass and add whipped cream and chocolate sauce, if desired.
- Add a straw.
- Enjoy!
Subscribe to:
Posts (Atom)


