Saturday, July 23, 2016

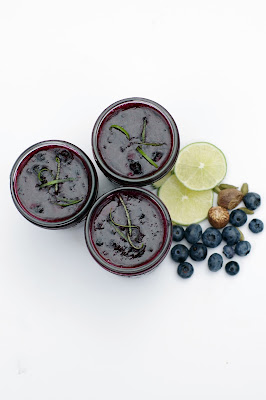
Easy Blueberry Freezer Jam

withinthekitchen.blogspot.com

Anyone with a free 20 minutes can make freezer jam. What's so great about freezer jam?
- quick
- easy
- tastes fresher and fruity than regular jam
- freezes well
- makes great gifts
- less sugar than traditional jam
- great activity for kids

Right now is blueberry season in Vancouver - I picked up 20lbs (that's right 20lbs!) of these plump and delicious berries last week. We froze a few pounds for winter smoothies and then went into cook/bake mode - sweet fruity, and buttery aromas were filling our kitchen thanks to hours of making  jams, crumbles, pies and cakes.

Today, I'm sharing the freezer jam the kids and I mixed up. Normally, I don't cook the fruit I use in freezer jam but in the case of blueberries a little bit of cooking softens the berry skins and brightens the flavour of the blueberries. Luckily, it only adds a few minutes to the process. 

If you don't like the spices I used or even the lime, just leave them out and you'll have pure, unadulterated blueberry flavour. The jams will last in the fridge for 3 or 4 weeks or place them in the freezer for up to a year.

To crush the berries, I pulse them a few times in my food processor - you want them chunky but broken down a bit.

Special equipment: 4 - 1 cup glass or plastic jars.

Ingredients

4 cups crushed blueberries (about 4-1/2 cups before crushing)
1 package freezer pectin (I use Bernadin pectin)
1-1/2 cup granulated sugar
zest of half a lime
juice of half a lime
1/2 teaspoon cardamom
1/2 teaspoon nutmeg

Instructions

  1. Place berries in pan over medium heat.
  2. Bring to a boil and remove from heat.
  3. In a large bowl, mix together pectin, sugar and spices.
  4. Add berries and lime juice and zest and stir for 3 minutes.
  5. Divide among containers and let sit for 30 minutes to thicken.
  6. Cover and refrigerate or freeze.

withinthekitchen.blogspot.com

withinthekitchen.blogspot.com

Monday, July 11, 2016

Beef Chili Cobbler


Beef Chili Cobbler

This dish is a huge hit in my house. The chili is delicious and, of course, can be tweaked to whatever you like - more spices, different spices, heck even taco seasoning tastes great in it. The biscuits are from Greg Henry's 'Savory Pies' which I reviewed here. You can substitute a different cheese if you like. As you can see, this is quite a versatile dish. 

You can make this dish ahead of time (in the morning or a day ahead). Make the chili, cool and refrigerate (I usually place it in another dish). Make the biscuit dough and refrigerate. I warm the chili first in the pan and continue as directed. 

Special Equipment: 12-inch cast iron pan

Ingredients


Chili
2 lbs ground beef
1 tsp salt
1 tsp ground pepper
1 medium onion, diced
1 poblano pepper, diced
1/2 jalapeno, diced
6 white mushrooms, diced
6 garlic cloves, crushed
2 tsp ground cumin
1/2 tsp chili powder
1 tsp smoked paprika
1 red pepper
1 14 oz can black beans, drained
2 cups beef broth
1 1/2 cups tomato sauce


Cobbler
1-1/4 cups flour
1/2 cup corn meal
1/2 tsp salt
1 tsp baking powder
1 tsp baking soda
1 cup grated parmesan
6 tablespoons cold butter, cut into on inch pieces
1-1/4 cups 2% milk

Instructions

Preheat oven to 375 degrees F.

Chili

  1. In the 12-inch cast iron pan, sautee ground beef with salt and pepper over medium-high heat to brown meat. This will take 7-10 minutes.
  2. Add onions, poblano, jalapeno, pepper, mushrooms, cumin, chili powder, paprika, and garlic. Sautee for about 5 minutes.
  3. Add beans, beef broth and tomato sauce.
  4. Simmer for 15 minutes.


Cobbler
  1. Add flour cornmeal, salt, and baking powder to the bowl of a food processor. Pulse 10 times to combine.
  2. Add butter, a piece at a time, and pulse until mixture has a sandy appearance.
  3. Add parmesan and pulse another few times to combine.
  4. Add milk and combine on medium-low speed until  coarse dough forms.


Putting it together
  1. Drop batter by the tablespoon or from an 2 inch ice cream scoop onto the chili (about 14 drops).
  2. Place the pan on a baking sheet to catch any overflow and insert into the oven for approximately 25 minutes (mixture is bubbly and cobbler is golden brown).


Wednesday, April 20, 2016

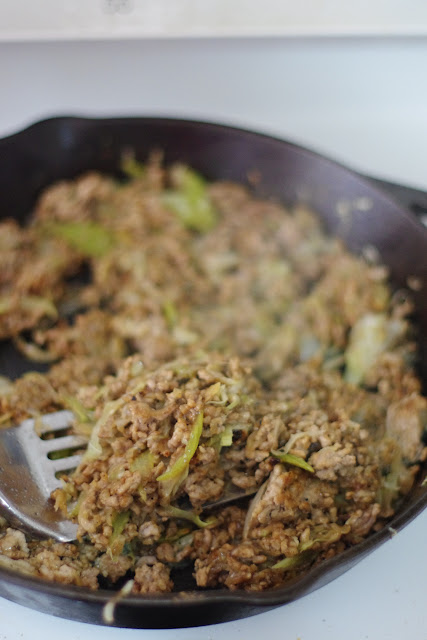
Baked Halifax Meat Egg Rolls

www.withinthekitchen.blogspot.com
Growing up in Halifax, Nova Scotia I was lucky enough to experience many amazing gastronomical creations that were not available elsewhere. My three top food items were:

  • Moon Mist Ice Cream - a combination of grape, banana and bubblegum flavours - the day I recently found out that Save-on-Foods carries it way out here in Vancouver was a very happy day indeed!!!!
  • Donairs - Halifax has the BEST donairs in the world. I miss them. I read that King of Donairs is expanding west. I hold out hope that some day they will open a shop out here on the west coast. 
  • Meat Egg rolls - Here is something that I have never found outside of Halifax - egg rolls made from a meat paste. No visible veggies, just meat. They are more flat than round and they are soooo good. Below is a recipe that is as close as I can come up with (based on a compilation of other recipes) to the memories of my childhood. Any other Haligonians out there missing their childhood egg rolls?


Makes 10 egg rolls.
Time: 40 minutes (20 prep; 20 bake)

Ingredients

1 lb ground pork
1 medium onion, diced
2 stalks celery, diced
1 cup shredded green cabbage
1 tsp salt
1 tsp ground pepper
1 tsp sesame oil
1 tbsp vegetable oil
2 tsp Chinese five spice powder
2 tbsp cornstarch
1-1/2 tbsp reduced sodium soy sauce
2 tbsp warm water
1 tsp garlic, chopped
10 egg roll wrappers

extra oil for brushing

Instructions

  1. Preheat oven to 400 degrees F.
  2. Heat large pan over medium high heat and and oils.
  3. Add pork, salt, pepper, and onions. Brown pork until cooked through – about 10 minutes.
  4. Add celery, cabbage, and five spice powder and cook until vegetables are soft – about 5 minutes.
  5. In a small, bowl combine cornstarch, soy sauce and water.
  6. Add to pan along with garlic, cook for 2 minutes.
  7. Take off heat.
  8. Place pork mixture in food processor and pulse until a smooth paste is formed.
  9. Place 3-4 tbsp of meat mixture in the middle of an eggroll wrapper.
  10. Brush beaten egg along the outside of the wrapper (about an inch wide).
  11. Fold one end of the wrapper over the long side of the mixture and press down. Then fold the other long side over that (like an envelope fold). Don’t make them too tight – they might burst.
  12. Fold the ends over about half an inch – all seams should be on one side of the egg roll. If they don’t stick you can add a bit more egg wash to make ends stick.
  13. Brush oil over both sides of egg roll and place on baking pan, seam side down.
  14. Bake for twenty minutes, flipping at 10 minutes.
  15. Serve with plum sauce or for something different serve with mango chutney!
www.withinthekitchen.blogspot.com

Thursday, April 7, 2016

S'more Tarts - A Grown Up Treat

www.withinthekitchen.blogspot.com

I love s'mores! Who doesn't, right? But sadly, we don't have access to a roaring campfire all that often. These individual tarts are a great way to bring back the s'more feeling when you can't make it outside (and bonus you can avoid all the smoke and ash of a real camp out).

This sour cream ganache has a tart/sharp flavour to it and is very rich! I think you could serve two people with one individual tart, if desired.

Makes 4, four inch tarts.

Crust

1-1/4 c graham crackers
1/4 c coconut
1/2 c unsalted butter, melted

Instructions

  1. Combine all three ingredients in a mixing bowl. 
  2. Remove two tablespoons of crumb mixture and set aside.
  3. Press into 4 mini tart pans (10cm/4 inches each) - as compactly as possible.
  4. Refrigerate for at least 20 minutes.

Ganache


1 cup full fat sour cream at room temperature
210 grams dark chocolate, broken into small pieces

Instructions

  1. Melt chocolate in double broiler.
  2. Take off heat and stir in sour cream until smooth.

Instructions - final steps


  1. Spoon ganache into graham tarts and smooth.
  2. Place mini marshmallows over ganache to cover tarts.
  3. Set oven to broil with rack about 4 inches from burner.
  4. Place all tarts on a rimmed baking pan and place under broiler. 
  5. Carefully watch until marshmallows are golden brown. You may have to remove individual tarts if you find some browning faster than others.
  6. If desired, drizzle with melted chocolate and sprinkle with left over crumbs.
  7. Can be left covered at room temperature for up to 6 hours.

www.withinthekitchen.blogspot.com
Too many marshmallows? Never!
www.withinthekitchen.blogspot.com

www.withinthekitchen.blogspot.com
Decadence at its best!
www.withinthekitchen.blogspot.com

Thursday, March 31, 2016

Hummus and Kale Salad Recipe

www.withinthekitchen.blogspot.com

Remember when everyone was in love with kale?? Well, honestly I did not jump on the bandwagon because I just didn't like it even though I wanted too. But I didn't like it raw, I didn't like it steamed, or stir-fried or baked.
And then the love fest with kale seemed to die down a bit.

Jim Gaffigan and kale:


Of course, that's when I finally found a kale dish I like, no, love.

One afternoon while walking on Granville Street and spending too much money and time shopping, I realized I was hungry. Hungry to the point of not caring what I ate. I grabbed a salad at a specialty grocery store without really looking.....turned out it was a hummus and kale salad.

Obviously, I didn't expect to like it but thought it would take care of my hunger and then figured I'd grab a coffee to cover the kale aftertaste. Except, I liked the salad. Mind blown. Today, I made my own simple version - chopped kale mixed with my favorite commercially made hummus. It's great on its own or with grilled chicken thrown in. Simple. Delicious.

PS - bonus -  kale is such a sturdy green that this salad will last 2 days in the fridge before it wilts!

Serves four as a side dish.

Ingredients

1 bunch green kale, chopped small
1 cup hummus
1/2 red pepper, chopped
2 green onions, chopped

Instructions

In a large bowl, mix the kale and hummus together.
Add red pepper and onions. Mix.


www.withnthekitchen.blogspot.com

Wednesday, March 16, 2016

Kefir Rye Soda Bread Recipe

www.withinthekitchen.blogspot.com

With St Patrick's Day just around the corner, I thought I'd share this easy, no yeast recipe for soda bread. It will go perfectly with Guiness Irish Stew or, heck, with a slab of butter and jam! If you don't have kefir, buttermilk can be substituted.

Ingredients

1-3/4 cups whole wheat flour
1 cup rye flour
1/2 cup rolled oats
1 tsp baking soda
1 tsp salt
1 egg
1 1/4 cup plain kefir

Instructions

  1. Preheat oven to 375 degrees F.
  2. In a large bowl, stir together flours, oats, baking soda and salt.
  3. In another bowl or large measuring cup, mix kefir and egg.
  4. With a fork, stir wet into dry ingredients. Do not over mix.
  5. Flour hands and shape the dough into a flat, round loaf.
  6. Place on floured or corn meal sprinkled baking sheet.
  7. Flatten into a disc that is approximately 4-5 cm high.
  8. Score a cross into the dough with 1 cm deep cuts.
  9. Bake for 40-45 minutes until it sounds hollow when tapped.
  10. Transfer to a wire rack and cover with a tea towel (keeps it soft).

Monday, March 7, 2016

Brown Sugar- Spice Cookies Recipe

www.withinthekitchen.blogspot.com


These cookies are simple, crispy yet chewy, buttery, and sweet - perfect in a lunch for the kids, or as a treat with your afternoon coffee. They also make great ice cream sandwich cookies.

Adapted from a recipe by Serious Eats. I like to add my favorite spices to this - cinnamon, nutmeg and cardamom. I also will often use 1 cup of whole wheat pastry flour and 1 cup all purpose flour. It adds a bit of fiber and I like the texture of the cookie with the pastry flour. 

Leave some room around each cookie as they do spread. This recipe makes two pans of cookies (12 on each pan) so I refrigerate the second pan while the first bakes. It helps ensure the second batch doesn't spread too much.

Quantity: about 24 cookies

Ingredients
  • ¾ cup plus 2 tablespoons unsalted butter, melted (7 ounces; 200 grams)
  • 1 1/2 cups packed dark brown sugar, divided (10.5 ounces; 300 grams)
  • 3/4 teaspoon salt (3g)
  • 1 large egg (50g)
  • 2 teaspoons vanilla extract (10ml)
  • 2 cups (10 ounces) all-purpose flour (285g) or 1 cup whole wheat pastry flour plus 1 cup all-purpose flour
  • 1 teaspoon baking powder (4g)
  • 1/2 teaspoon baking soda (2g)
  • 1 teaspoon cinnamon
  • 1 teaspoon nutmeg
  • ¾ teaspoon ground cardamom
 Instructions
  1. Preheat oven to 350°F. Line two baking sheets with parchment paper or silpats.
  2. Mix butter, brown sugar, and salt in a large bowl.
  3. Add in egg and vanilla and stir.
  4. Add to the bowl, flour, baking powder, baking soda, cinnamon, nutmeg, and cardamom and gently mix until combined.
  5. Pour 1 cup raw or turbinado sugar into a separate bowl.
  6. Scoop dough using a 1 inch cookie scoop, or about the size of a walnut sized and gently roll in sugar. 
  7. Place on cookie sheet and press down slightly to ½ inch thickness. Place 12 on each pan.
  8. Bake about 10 minutes - until golden edges appear and the tops have puffed and crinkled a bit.
  9. Let cookies cool on pans for 5 minutes, then transfer to wire rack to cool completely.

Wednesday, February 24, 2016

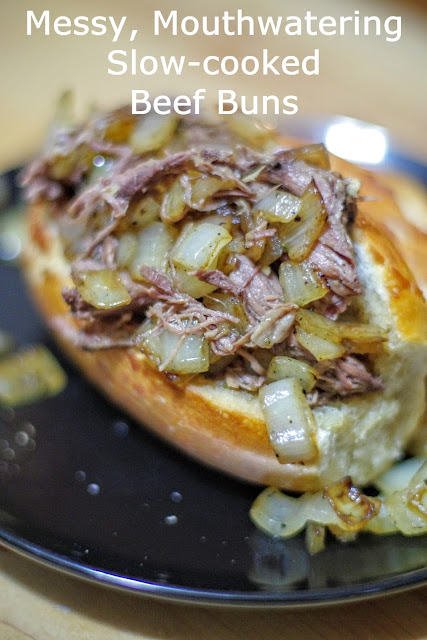
Messy, Mouthwatering Drippy Beef Buns

withinthekitchen.blogspot.com

This messy, drippy beefy sandwich is great on any rainy, cold day...or any other day for that matter.

We've had lots of beef dips before but never with peperoncini peppers until today - you can thank Ree Drummond for that! If anyone in your house doesn't like the peppers (they are quite mild) they are easy to pull out.

Based on a recipe from Pioneer Woman.

Ingredients


2 tbsp butter
2 tbsp vegetable oil
3 lb blade pot roast
1 tsp salt
1 tsp ground pepper
2 cups beef stock
1-1/2 cups water
1 tbsp ground rosemary
2 cloves of garlic, thinly sliced or crushed
1 375 ml jar of pickled peperoncini peppers (12 ounces)
dash of Worcestershire sauce (optional)
2 drops liquid smoke (optional)

2 medium onions, diced
1 tbsp butter
1/2 tsp salt

8 crusty buns

Instructions

  1. Preheat oven to 300 degrees F or 150 degrees C.
  2. Season the roast by sprinkling salt and pepper evenly over it.
  3. Add the butter and oil, over high heat, to a medium sized dutch oven or oven proof pot.
  4. When the pot is very hot (almost smoking), seer the beef on all sides. You want a beautifully brown, caramelized colour on all sides.
  5. Once seared, remove beef from pot and remove left over oil/butter. You don't have to clean the pot, just get rid of the extra fat.
  6. Add back the beef, beef broth, water, rosemary and garlic.
  7. Remove the stems, if desired, from the peppers (I usually just pull them off) and add them and all the juice from the bottle into the pot.
  8. If desired, add a dash of Worcestershire sauce and liquid smoke.
  9. Bring to a simmer over medium high heat.
  10. Turn off heat, cover and place in the oven for 3-1/2 to 4 hours. To test: The beef should easily pull apart with a fork when done.
  11. You can remove the beef to another bowl to pull apart or shred the beef (if your roast was held together by string - remove it!) with two forks or just keep it in the cooking liquid.
  12. Heat saute pan over medium heat and add butter.
  13. Add onions and salt.
  14. Saute until golden brown, approximately 10 minutes.
  15. Slice buns (you may want to take out some of the bread so you have room for more meat!) and pile with meat and onions. Add some extra beef cooking liquid to make a moist, drippy, beautiful mess of a sandwich!

If you want to make this the day ahead of time, complete step #10. Take out the peppers, cool and refrigerate overnight (beef and peppers separately). The next day, use a spoon to remove the layer of fat that congeals on top and discard it. Add the peppers back into the pan and reheat on stove top over medium heat. Go to step #11.

You can also toast your buns before loading them with meat - this is a good tip if your buns are really soft.

Enjoy!

Fresh rosemary.
Ground rosemary.
Spicy but not super hot.
Mouthwatering, right?
Practically falls apart.


Friday, February 12, 2016

Why cauliflower is hotter than Jennifer Lawrence - Spicy Cauliflower Couscous Recipe

withinthekitchen.blogspot.com
Have you noticed that cauliflower is hotter than Jennifer Lawrence these days? They are constantly being splashed across the news - Jennifer and cauliflower - but honestly, I've see more cauliflower lately than JLaw. Why? Why? Why?

The price! Everyone is talking about the price of cauliflower. Last week a head of the white coniferous was selling for $7.99 - for one piddly head!

Thankfully, a secret stash of the vegetable must have been unearthed as the price came down quite a bit at my local vegetable market - two heads for $4! Even though they aren't my favorite veggie,  I grabbed four! I just had to figure out what to do with the cabbage cousin. I thought given their status of late, I had to do something more than serve them raw with ranch dip or steam them until they were limp.

This recipe has a tonne of flavour, and not a lot of calories. It reminds me of couscous without the all the carbs and calories. Did you know an entire head of cauliflower (5 inches wide) has less than 150 calories???

I added a little bit of oil to saute the onions, peppers and carrots but that's it. Spices are key in this recipe. I've listed what I use but if you hate cumin - don't add it! Add more (or less) chili powder. Kick up the curry, if that is what you like. Be generous in what you add - build up your favorite flavours.

You can add other veggies, if you like. Or add beans, meat, prawns or parmesan cheese! The choice is yours.

Here's hoping cauliflower's lower price is here to stay because I'd love to keep this dish on the menu at our house!

Now excuse me, I have to go watch "Joy" - JLaw rules.

One of my new favorite ways to eat this as a quick dinner is to slice open a pita, spread hummus on one side and then add a scoop of spicy cauliflower (warm or cold). Roll it up and eat! You could use a lettuce leaf if you want more crunch and fewer carbs.

Ingredients

1 tbsp oil
2 small heads of cauliflower, cut up in small to medium sized pieces
1 small onion, diced
1/2 yellow pepper, diced
2 medium carrots. diced
2 garlic cloves, chopped as small as possible
1 tsp salt
1 tsp ground pepper
3/4 tsp chili pepper
1 tsp smoked paprika
2 tsp curry powder
1 tsp garlic powder
1 tsp onion powder
2 tsp coriander
1/2 tsp sumac
1 bunch Italian parsley, chopped

Instructions

  1. Working in batches, pulse the cauliflower 8- 10 times until the consistency of couscous or rice - you don't want mush!
  2. Place the cauliflower in a large bowl and mix in all of the spices.
  3. Place a large saute pan over medium high heat.
  4. Add the oil.
  5. Once hot, add the onions, pepper and carrots. Saute for 3-4 minutes.
  6. Add the chopped garlic cloves and the cauliflower.
  7. Saute for another 5 minutes until heated through.
  8. Sprinkle with parsley.
  9. Serve.

Saturday, February 6, 2016

Review of Terra Coffee and Tea

www.withinthekitchen.blogspot.com
Perfect way to start your day or get through a long afternoon!

Terra Coffee

When Terra Coffee asked if they could send me a sample of there coffee and tea, I was excited - coffee is one thing I just couldn't live without and my kids love herbal teas! I was even more excited when I opened the box - it was chock full of coffee, teas, and cocoa and hot chocolate. Over the past month, we've had a great time brewing and drinking all of the products.

There are so many great things to say about the company and its products.

The Company

Let's start with the company - Terra Coffee. It's Canadian! Based in Montreal, Terra Coffee roasts it's coffee beans to their own exact standards. In fact, over their 30 year history, they have created their own roasting method known as Torréfaction Artisanale Granito (T.A.G). It ensures that their beans are never be under or over-roasted and that the beans' "sugars have been fully caramelized in order to create the most body as well as deliver rich flavour notes."

I also love, love , love that they believe in giving back and being socially responsible to the communities and farmers where they buy their beans through the Humaniterra Foundation.

Coffee

Terra coffee have a variety of blends and single source coffees available. You can buy them online by the bean or ground. Over the past month we've enjoyed Terra's Gran Riserva - Cuba Caracolillo and Terra Classica - Le Montreal.

Gran Riserva is part of their exclusive estate, single origin coffees selected by their own Master Roaster. Cuba Caracolillo is described as "highly intense aroma with a delicate sweetness and unmistakable hint of chocolate." We found it to be our go to morning coffee - it's rich and full bodied - a perfect way to start a busy day.

We also enjoyed Le Montreal - a blend of beans from South America, Asia and Indonesia that are roasted in small batches. I prefer this blend in the afternoon - it's a bit earthy and still rich - a perfect pick me up to ensure you get through those long afternoon meetings!

Tea


www.withinthekitchen.blogspot.com
The tea samples were abundant and included:
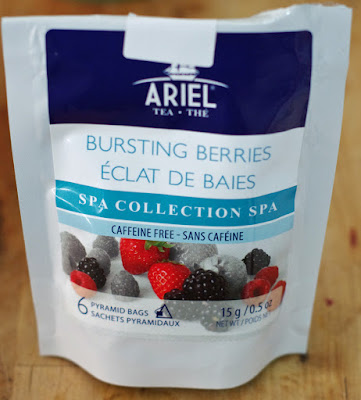
  • Bursting Berries from their Spa Collection
  • Vanilla and Pear White Tea
  • Lemon Citrus Green Tea
  • Moroccan Mint
  • Masala Chai
Their Ariel line of teas is huge and available in loose leaf and biodegradable pyramid-shaped tea bags. A portion of their tea sales also go to charity.

Our favorite by far was Bursting Berries from the Spa collection which is caffeine free an dmade from herbs, spices and fruits. Bursting Berries is a fruit infusion of dried elderberries, raspberries and other mountain berries. This tea is so fruity, fresh and sweet - no bitter notes at all.  We had it hot and made another batch cold. It's now the kids favorite tea! I foresee us making this as an iced tea throughout the summer months.
withinthekitchen.blogspot.com
Bursting Berries from the Spa Collection

We weren't big fans of the vanilla pear tea but a friend loved it so we sent it home with her. I think that's the great thing about this line of teas - there is something for everyone.
www.withinthekitchen.blogspot.com
Vanilla and Pear White Tea - something for everyone.

Hot Chocolate and Cocoa

This brings us to the cocoa and hot chocolate. The hot chocolate is rich and chocolaty - perfect on a cold wintry day - especially when topped with a hand full of marshmallows.

This dutch processed cocoa is 100% organic, dark, and rich. Do you know what the difference is between dutch processed and natural cocoa? Dutch process cocoa is bathed in a potassium carbonate solution to neutral cocoa acidity. Dutch process cocoa usually has a pH level of 7 (same as water) vs natural processed cocoa that has a pH level of 5 or 6. Natural cocoa has a sharper flavour. Due to the neutrality of the dutch processed cocoa, it doesn't react to alkaline leaveners like baking soda. As a result baking powder is m ore common in recipes using this type of cocoa.

I've used the cocoa in my favorite brownie recipe with lovely results - deep, dark, fudgy.

If, like me, you live no where near Montreal don't despair - they deliver! If you sign up for their newsletter you will receive 25% off your first order.

*I was not financially compensated for this post. I received a sample for review purposes. The opinions are completely my own.

Tuesday, February 2, 2016

Cardamom Vanilla Tea

withinthekitchen.blogspot.com

So simple, so good.

A former work colleague of mine would occasionally bring a cup of this delicious tea into work for me. Her husband makes her a cup every morning!

Makes 2 cups of tea.

Ingredients

1.5 cups water
1 cup milk
2 black tea bags
2-3 cardamom pods
1 tsp vanilla
1/2 vanilla bean pod

Instructions

  1. Add all ingredients to a small sauce pan.
  2. Simmer for 20 – 30 mins. 
  3. Remove tea bags and pods.
  4. You can also add a little bit of fresh ginger if desired. Enjoy!
withinthekitchen.blogspot.com

Saturday, January 16, 2016

Mango Blueberry No Nut Granola Recipe

www.withinthekitchen.blogspot.com


Every few months I make a batch of granola. The kids eat it with yogurt or milk. They also love taking it to school as a snack at recess. For this reason, I make it nut free.

This time I used coconut oil. At room temperature, it is solid but as soon as it hits 76 degrees it will begin to liquefy. By heating the oils and the spices, the spices bloom and their flavors and aromas are released. Your kitchen will smell great!
www.withinthekitchen.blogspot.com

This makes a big batch of granola so I usually distribute half of it into small snack bags so they are ready for lunch boxes or snacking at anytime. The other half of the batch goes into a big container that we keep on the counter for easy kid-access!

Note about coconuts from this Health Canada site: A coconut is a seed of a fruit and nutmeg is obtained from the seeds of a tropical tree. Coconut and nutmeg are not considered tree nuts for the purposed of food allergen labeling in Canada and are not usually restricted from the diet of someone allergic to tree nuts. However, some people have reacted to coconut and nutmeg. If you are worried, consult your allergist before trying coconut or nutmeg products. 

I also make sure anyone who eats it knows there is coconut oil in it.


Ingredients

1/4 cup canola oil
3/4 cup coconut oil
1 c maple syrup
2 tsp vanilla
1 tbsp cinnamon
1 tsp ground nutmeg
1 tsp cardamon
1 tsp salt
8 cups rolled oats
1 cup wheat germ
1 cup wheat bran
1 cup milled flax
3/4 cup dried blueberries
1 cup dried mango, chopped

Optional
1/2 tsp fleur de sel

Instructions

  1. Preheat oven to 325 degrees F.
  2. In medium sized pot combine oils, maple syrup,vanilla, cinnamon, nutmeg, and cardamom.
  3. Stir over medium-low heat until just simmering and remove from heat. Watch carefully and be careful not to burn yourself.
  4. Combine oats, wheat germ, bran and flax with salt.
  5. Pour oil mixture over oats and stir until well combined.
  6. Spread granola on two large cookie sheets.
  7. Bake for 30-40 minutes until golden. While baking, stir granola every ten minutes to ensure even baking.
  8. Remove from oven.
  9. If desired, add sprinkle of 1/2 tsp fleur de sel. 
  10. Cool completely.
  11. Place in large bowl.
  12. Add dried fruits and combine.
  13. Store in air tight containers.
www.withinthekitchen.blogspot.com

www.withinthekitchen.blogspot.com
Enjoy!

Sunday, January 10, 2016

Grandma's Easy Date Squares Recipe


www.withinthekitchen.blogspot.com


Date squares? Have you ever had one? Is it a dessert you associate with your great aunt Agnes? Date squares seem to have become something of an "old-fashioned" dessert. Date squares or matrimonial squares (some say because they were made with so many "dates". Get it? You gotta go on a lotta dates to get married???) as they are known in some parts of Western Canada have been around since at least the 1930s.

www.withinthekitchen.blogspot.com
They are made from a layer of sweet, gooey dates that is sandwiched between two layers of buttery golden oats.

www.withinthekitchen.blogspot.com
My mom used to make them when I was a kid but I hadn't thought much about them since then. That is, until my 9 year old son saw a bag of dates at the grocery store. He wanted to try them. They were on sale so I bought two bags since my brain flickered with the idea of date squares. Turns out my son didn't like dates straight out of the bag (no surprise). That left me with two bags of dates and the brain flicker turned into a brighter light (luckily I didn't have the urge to walk into it).

I knew the kids would love the oat mixture - it's pretty much a crumble topping but I wasn't sure about the dates in the middle. Would the texture be appealing? In a word. YES. Yes, it would . Granted the dates are mixed with enough sugar to make them sweet and delicious and taste bud friendly to almost anyone.

I think date squares deserve a new minute in the sun, another 15 seconds of fame and it starts right here. Try this recipe. Let me know what you think of them. I know you'll love them (so will your great aunt Agnes so be sure to share)!


Ingredients

2 cups dates
3/4 cup water
1/4 cup orange juice
1/2 tsp baking soda
1/4 cup brown sugar (can reduce or increase this amount to suit tastes)

1-1/2 cups large flake oats
1-1/4 cup flour
1 cup brown sugar
3/4 cup unsalted butter, softened
1/2 tsp baking powder
1/2 tsp salt
1 tbsp cinnamon

Instructions


Fruit Mixture:

  1. Place dates, water, juice, baking soda and sugar in sauce pan.
  2. Bring to a boil.
  3. Reduce heat and simmer for approximately 10 minutes.
  4. Remove from heat.
  5. Using a fork or potato masher, squish the date mixture a bit to form a coarse paste.
  6. Cool.

Oat Mixture:

  1. In large mixing bowl, add flour, sugar, oats, salt, baking powder and cinnamon.
  2. Mix with hands,
  3. Cut butter into 1 inch pieces and add to bowl.
  4. Using your hands, rub and mix butter and other ingredients together until you have a  crumbly mixture that will hold together if squeezed.

Making the squares:

  1. Preheat oven to 350 degrees F.
  2. Spray an 8x8 baking dish with non stick spray.
  3. If desired, line with parchment or nonstick foil, letting it hang over edges for easier removal later. 
  4. Place half of oat mixture in bottom of dish and use your hands to firmly press mixture evenly over bottom.
  5. Add all of the cooled date mixture on top of crumble and spread evenly (I use an offset spatula).
  6. Add rest of oat mixture over dates.
  7. Gently press down to cover fruit.
  8. Bake for approximately 30-35 minutes, until top is golden brown.
  9. Remove from oven and cool completely.
  10. Either cut in pan or remove by pulling overhanging foil.
  11. Cut into desired number of squares.