Showing posts with label Daring Bakers. Show all posts

Sunday, April 27, 2014

Daring Bakers - Easter Bread

I've tasted Easter Bread and this isn't it.

Harsh words, I know. Especially harsh since this is an easy recipe and the bread tastes quite good. The kids even had a great time being in charge of coloring and drizzling the glaze. But you know when you associate a specific food with someone, or someplace, or some specific time?

Well, that's what it's like with me and Easter Bread. My first Easter Bread experience was one made by a lovely Italian woman with a big heart and bigger personality. Dipped into coffee, it was heaven and a completely new experience. Easter bread didn't exist before then; I had never even heard of it before.

The fact is, no other Easter Bread will be the same to me. I guess it's like when nothing tastes better than the grilled cheese your mom makes, or the sugar cookies your grandma made when you were seven. So yes, I've tasted Easter Bread and this isn't it but it could be the beginning of your Easter Bread tradition ... the recipe is from Stanley Tucci's recipe book ... so I'm guessing it's his favorite.

My favorite will always be the one I first tasted, no matter how many other Easter Breads come my way.

The April Daring Baker’s Challenge was hosted by Wolf of Wolf’s DenShe challenged us to Spring into our kitchens and make Easter breads reflecting cultures around the world. 

If you haven't heard of the Daring Baker's, you should check out their website. Every month there is a new challenge - one for bakers and one for cooks...so if you want to push the boundaries of your kitchen talents and have some fun please join!

Click here for a pdf version of our challenge recipes.


Tuesday, October 1, 2013

Three Milk Cake - Daring Bakers


The Daring Baker Challenge this month was to bake a pastel de tres leches or three milk cake. It was the first time I 
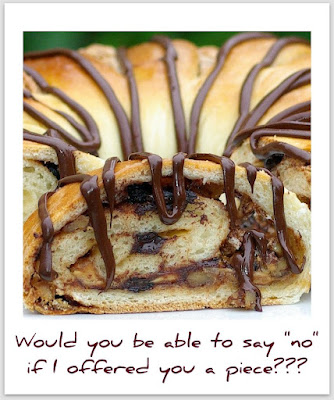
had ever made (or tasted) this type of cake. It was delicious!

Inma of la Galletika was our Sept. 2013 Daring Bakers’ hostess and WOW did she bring us something decadent and delicious! Pastel de Tres Leches or Three Milk Cake, creamy yet airy, super moist but not soggy.. just plain delish!

This recipe is slightly adapted from Fine Cooking

For the cake:

  • Unsalted butter, softened, for the pan or cooking spray
  • 4-1/2 oz. (1 cup) all-purpose flour
  • 1-1/2 tsp. baking powder
  • 1/4 tsp. kosher salt
  • 5 large eggs, at room temperature
  • 1 cup granulated sugar
  • 1/3 cup  milk
  • 1 tsp. pure vanilla extract

For the soaking liquid:

  • 1 14-oz. can sweetened condensed milk
  • 1 cup evaporated milk
  • 1/2 cup whipping cream (heavy cream)
  • 1/2 cup strong brewed coffee
  • Pinch kosher salt

For the topping:

  • 2 cups heavy or whipping cream
  • 2 tbsp sugar
  • 1 tsp vanilla

Bake the cake:

1.      Preheat oven to 350°F.
2.      Butter the bottom and sides of a 9x13-inch Pyrex or glass baking pan. Line the bottom of the pan with parchment and lightly butter or spray the parchment.
3.      Whisk the flour, baking powder, and salt into a medium bowl. Set aside.
4.      Separate the eggs, putting the whites in a medium bowl and the yolks in a large bowl.
5.      Using electric beaters, beat the egg yolks with 3/4 cup of the sugar until the mixture is pale yellow in colour (2 minutes).
6.      Add the milk and vanilla and continue to beat until combined.
7.      Clean and dry your beaters (this is important – you don’t want any of the yolks on it or they whites won’t fluff) and then beat the egg whites, gradually increasing the speed to high, until they reach soft peaks. (3 minutes)
8.      Add the other 1/4 cup sugar slowly, continuing to beat on high, until you reach firm but not dry peaks. ( 2 minutes-ish more).
9.      Whisk a third of the dry ingredients into the yolk mixture and thoroughly mix.
10.   Lightly fold in a third of the egg whites with a rubber spatula.
11.   Alternately, fold in the remaining flour and egg whites, in two more batches each, until fully mixed.
12.   Pour the batter into the prepared pan and bake until a toothpick inserted in the center comes out clean and the cake is golden, about 20 to 25 minutes.
13.   Let the cake cool in the pan on a rack for 10 minutes, then invert the cake onto the rack, remove the parchment, and let cool completely. It will shrink a bit – that’s ok.
14.   Put the cake back into the baking dish  so the cake will soak up more of the liquid.

Soak the cake:

1.      In a large saucepan, mix together the condensed milk, evaporated milk, heavy cream, coffee, and salt until it is all well blended. Cook over medium-low heat (don’t burn it!) until it begins to bubble around the edges, 3 to 5 minutes. Remove from the heat and pour into a large heatproof glass measuring cup so it stops cooking.
2.      Using a toothpick, poke the cake at 1/2-inch intervals. Slowly, pour the soaking liquid over the cake, starting at the edges and waiting to let it soak in before adding more liquid. Cover loosely with plastic wrap and refrigerate at least 2 hours and up to 36 hours.

Top the cake:

1.      Beat the whipping cream on medium speed until it begins to thicken
2.      Add the sugar and vanilla and continue to beat until it holds a firm peak.

3.      Spread on the cake.

Wednesday, March 27, 2013

Purple Yam Swiss Roll


I've seen purple yams/sweet potatoes used in many Filipino desserts here in Vancouver but I had never tried one myself. A vegetable as a dessert? Hmmm not sure about that ;) 

The thing that stands out the most is obviously the colour! I've never seen such a beautiful purple from a natural source before! Once steamed it is very sweet - more so than a traditional yam/sweet potato, I think - so it really does work well in desserts. The texture was certainly different than what I am used to in a dessert and at room temperature it wasn't my favorite BUT once refrigerated for a couple of hours it was great AND after our first night I froze the left overs and the next day it was heaven! It was very much like an ice cream cake! YUM.
Love the colour!


Roll the cake from the short end and leave half an inch of no filling at the
far side so it doesn't squish out.


Cut off the ends if you want a cleaner presentation.


I brushed some purple food gel onto my silpat
thinking it would  blend into the batter - it didn't!
But I  still like it!


So pretty!


I liked the texture best when frozen for a few hours.


Swiss Roll Cake (based on a recipe by Rose Levy Beranbaum)

1/4 cup (33 grams) whole wheat pastry flour
2-1/2 tbsp cornstarch
4 large eggs, at room temperature
1 large egg yolk
1/2 cup sugar + 1 tbsp sugar
1 tsp vanilla
1/4 tsp cream of tartar
icing sugar for dusting

Instructions

  1. Preheat oven to 450 degrees F.
  2. Using a half-sheet pan (17-1/4 x 12-1/4) coat with non stick spray then place a silpat or nonstick liner on the pan. Spray the silpat with baking spray the contains flour.
  3. Separate 2 eggs, and place the yolks in a mixer stand bowl and the whites in another bowl and set aside.
  4. To the yolks add the two whole eggs, 1/2 c sugar and one more egg yolk. Beat this at high speed for 5 minutes. Add vanilla and mix in at medium speed. 
  5. You need the mixing bowl again so place the yolk mixture into another bowl. Clean the original mixer bowl really well as any fat left in the bowl will affect the beating of the egg whites.
  6. In a small bowl, whisk the flour and the cornstarch.
  7. Sift half the flour mixture over the egg yolk mixture. Fold it in very gently. Repeat with the remaining half of the flour.
  8. In the large, cleaned stand mixer bowl add the egg whites. Using the whisk attachment beat the whites on medium speed until they are foamy. Add the cream of tartar. Increase the speed to medium high and beat until the whites form soft peaks. Add 1 tbsp sugar and beat until stiff peaks form when whisk attachment is lifted. Fold the whites into the yolk mixture. 
  9. Pour the batter onto the baking sheet and smooth with an offset spatula. 
  10. Bake for 7-8 minutes until golden brown.
  11. Immediately loosen the sides of the cake from the sides of the pan. Gently slide the liner and cake out of the pan and on to a work surface. Sift the icing sugar over the cake. While hot, roll the cake from the short end making sure you include the liner as you roll. 
  12. Set the cake on a wire rack to cool for 45 minutes.

Purple Yam Mixture

1-1/2 cups purple sweet potatoes, peeled cut and steamed (they need to be hot)
3 tbsp butter
1/3 cup icing sugar
2 tbsp cream cheese
1/2 c whipping cream


Instructions

Using food processor with the steel blade attached, add all the ingredients. Process until smooth. Refrigerate for 30 minutes.


Putting it all together

Unroll the cake and carefully detach the cake form the liner and them lay it back on the liner again. 

Spread the potato mixture evenly over the cake leaving 1/2 inch of no icing on one short end. Starting at the other end, tightly and firmly roll the cake. Place on a serving plate with seam side down. Refrigerate or freeze for at least an hour before serving.

Monday, August 27, 2012

Daring Bakers August - Pate a Choux Swans and Stabilized Whipped Cream


Kat of The Bobwhites was our August 2012 Daring Baker hostess who inspired us to have fun in creating pate a choux shapes, filled with crème patisserie or Chantilly cream. We were encouraged to create swans or any shape we wanted and to go crazy with filling flavors allowing our creativity to go wild! 

I've made choux pastry before and went from being very intimidated by the thought of this dough to realizing it's quite easy to make and work with! My previous and only use of the dough was used in creating a delicious Croquembouche so I was looking forward to using it again in making a bevy of swans. My only concern was that the final result might look more like ugly ducklings than beautiful swans!  

I'll let you be the judge as to whether or not I succeeded!  

I kept it simple and used stabilized whipped cream as my filling.

Click here for a pdf of all the recommended recipes and look below for my stabilized whipped cream recipe.


Stabilized Whipped Cream

Using stabilized whipped cream will prevent it from separating - especially useful on warm days!

Ingredients

1/4 c water
1 tsp unflavoured gelatin
1 c heavy or whipping cream
2 tbsp sugar
1 tsp vanilla

What to do

  • Chill your bowl and beaters in the freezer for 20 minutes.
  • Place water in a deep microwave safe bowl and sprinkle gelatin over the water.
  • Let sit for 5 minutes.
  • Microwave the the gelatin mixture for three minutes making sure you you stir every 30 seconds or so or it might bubble over and make a mess!
  • Let it sit for about 10 minutes so that the mixture is liquid but not warm.
  • Remove your cold beaters and bowl from freezer and pour in cream. Beat until soft peaks form.Add vanilla and sugar and whip for 10 seconds more.
  • Add gelatin mixture and whip until stiff peaks form.

Friday, April 27, 2012

Daring Baker's Challenge Part I - Armenian Nutmeg Cake


The Daring Bakers’ April 2012 challenge, hosted by Jason at Daily Candor, were two Armenian standards: nazook and nutmeg cake. Nazook is a layered yeasted dough pastry with a sweet filling, and nutmeg cake is a fragrant, nutty coffee-style cake.

Until this challenge, I had never heard of Armenian Nutmeg Cake. Little did I know my life was poorer for it. First off, this cake tastes amazing. The spices make something that your tastes buds will recognize as comfort food even if, like me, you have never bit into this peace of heaven before. Second, even though kids will love it, the flavours are quite sophisticated and filled with depth. Third, this cake is super easy to make!

This dessert is perfect for a tea party, a dinner party or a pity party! Try it. You're gonna like it!


Armenian Nutmeg Cake


Makes one 9”/23cm cake which yields 12 servings

Ingredients

• 1 cup (240 ml) milk
• 1 teaspoon baking soda
• 2 cups all-purpose (plain) flour
• 2 teaspoons baking powder
• 2 cups brown sugar, firmly packed
• 3/4 cup (1½ sticks) butter, preferably unsalted, cubed
• 1/2 cup walnut pieces or pumpkin seeds, may need a little more
• 1 to 1-1/2 teaspoons ground nutmeg (try to grate it fresh yourself)
• 4 pods of green cardamom, seeds removed and crushed (discard pods) or ½ tsp ground cardamom
• 1 large egg


What to do
(using food processor, and a 9-inch spring form pan)

1. Preheat your oven to moderate 350°F

2. Mix the baking soda (not baking powder) into the milk. Set aside.

3. Put the flour, baking powder, and the brown sugar into your food processor. Pulse until uniformly mixed.

4. Toss in the cubed butter. Pulse until uniformly mixed into tan-colored small crumbs.

5. Pour HALF of the crumbs into your spring form (9”/23cm) pan. Press out a crust using your fingers and knuckles.

6. Crack the egg into the food processor with the rest of the crumbs still in it.

7. Toss nutmeg and cardamom into the food processor, too. Pulse until well-incorporated.

8. Pour in the milk and baking soda mixture. Continue to mix until a slightly lumpy tan batter is formed.

9. Pour the batter over the crust in the spring form pan.

10. Gently sprinkle the walnut or pumpkin pieces over the batter.

11. Bake in a preheated oven for 35-40 minutes. It's ready when the top is golden brown, and when it passes the toothpick test (comes out clean).

12. Cool the cake in the pan, and then dig in. Yum yum!

Freezing/Storage Instructions/Tips: Armenian nutmeg cake will keep (covered) at room temperature for 2-3 days. Taste better still warm from the oven.

Allow to cool completely before attempting to freeze. Armenian Nutmeg Cake will freeze fairly well if completely sealed. Can be frozen for up to 3 months.


Tuesday, March 27, 2012

Daring Baker's Challenge - Dutch Crunch or Tiger Bread


Sara and Erica of Baking JDs were our March 2012 Daring Baker hostesses! Sara & Erica challenged us to make Dutch Crunch bread, a delicious sandwich bread with a unique, crunchy topping. Sara and Erica also challenged us to create a one of a kind sandwich with our bread! Here is a pdf of the recipes given to us this month. I made the soft white rolls.

Bread making scares people....including my seven year - probably had something to do with me telling her yeast were living organisms which made her ask if they bite. lol. Anyways, bread is easy to master..really. Sure you "knead" to follow directions but how hard is that? And the kneading part is kinda relaxing in a weird way.

It takes a couple of hours of your life but the aroma that fills your home makes it worth it and then when you take your first bite and you realize that you made this with your own hands...wow, you will think you are a genious and first class baker!! Try it, you'll like it.


The other part of our challenge was to create a sandwich with our "tiger" bread. I made Montreal smoked beef sandwiches with smoked gouda cheese, cheddar, avocado, horseradish and mayo. They were a hit with the whole family.


Monday, February 27, 2012

Daring Bakers - Grape-Almond quick bread


Grapes are not used to their full potential. You see them in tarts,fruit salad and on cheese plates but rarely in other baking. I wasn't sure if there was a reason for this or not but I wanted to find out!

I decided to create a grape quick bread with a lemon glaze (lemons and grapes really compliment each other). Did it work? Definitely! The grapes shrink a little bit which increases their sweetness and the lemon glaze adds a bit of zing.

The Daring Bakers’ February 2012 host was – Lis! Lisa stepped in last minute and challenged us to create a quick bread we could call our own. She supplied us with a base recipe and shared some recipes she loves from various websites and encouraged us to build upon them and create new flavor profiles.

See other recipes here.


Adapted from thekitchn

Ingredients
1 tsp ground Cinnamon
1/4 tsp Nutmeg
2 tbsp ground Flax (optional)
2 tbsp hemp hearts (optional)
1/2 c whole wheat flour
1-1/2 c all purpose flour
1/2 c super fine sugar
1 c grapes, cut in half
1 egg
1 c buttermilk
1/4 c butter, melted
1 tsp almond extract
1-1/2 tsp baking powder
1 tsp baking soda
1 tsp salt

Glaze
1 cup powdered sugar
1-2 tbsp lemon juice depending on how thick you want it
What to do
  • In a large bowl, whisk together spices, flours, sugar, baking powder, baking soda and salt.
  • In a medium bowl, combine melted butter, buttermilk and almond extract.
  • Pour wet ingredients over dry.
  • Stir to combine. Use a light hand and stop as soon as ingredients are mixed. If you over stir, your loaf will be tough.
  • Gently fold in grapes.
  • Scoop batter into 9 x 5 pan.
  • Bake for 45-55 minutes or until toothpick inserted into middle of loaf comes out crumbless.
  • Remove from oven and cool for 5 minutes.
  • Meanwhile prepare glaze by combining powdered sugar and lemon juice. Whisk until smooth.
  • Poke loaf multiple times with a wooden skewer or toothpick.
  • Pour glaze over warm loaf.
  • Cool and dig in!

Friday, January 27, 2012

Daring Bakers Challenge


Audax Artifex was our January 2012 Daring Bakers’ host. Aud worked tirelessly to master light and fluffy scones (a/k/a biscuits) to help us create delicious and perfect batches in our own kitchens!

Baking powder biscuits require few ingredients and not much time but many home cooks say they are hard to perfect. Tough biscuits, biscuits that don't rise properly, not flaky enough, not tender enough...oh the problems can be endless with these little gems.

But this month's Daring Baker's Challenge explained the science behind the baking powder biscuit. Taking to heart even a few of the tips will take your biscuits to new heights. Most important tips in my opinion are:
  • use frozen butter
  • let dough rest in fridge after initial mixing and before putting cut biscuits in the oven
Frozen butter is the secret..shhh...don't tell anyone!

Here is the recipe and tips so you can try it yourself!

Monday, November 28, 2011

Daring Bakers' Challenge - Filopino Desserts - Sans Rival


Catherine of Munchie Musings was our November Daring Bakers’ host and she challenged us to make a traditional Filipino dessert – the delicious Sans Rival cake! And for those of us who wanted to try an additional Filipino dessert, Catherine also gave us a bonus recipe for Bibingka which comes from her friend Jun of Jun-blog. (I didn't do this bonus recipe but it looks great.)

This Filipino dessert is amazing and is a decadent dessert ...definitely something I will be making on special occasions. It's a very rich combination of dacquoise and buttercream that is relatively simple to make. Simple as it may be to create, it will also impress your guests with its beautiful layers. In my version there were four layers of chocolate dacquoise separated by three layers of raspberry buttercream. I enrobed all of these layers in a coffee buttercream and added some fresh raspberries for extra visual appeal.

If you decide to make your own Sans Rival I recommend picking a buttercream recipe that is not to sweet. I used neoclassical buttercream created by Rose Levy Beranbaum...the plus to this recipe is that it doesn't require a candy thermometer!
You can check out the recipe here.

Tuesday, September 27, 2011

Croissants - Daring Bakers Challenge

The Daring Bakers go retro this month! Thanks to one of our very talented non-blogging members, Sarah, the Daring Bakers were challenged to make Croissants using a recipe from the Queen of French Cooking, none other than Julia Child!


I love freshly baked bread...the taste, the smell, the feel of it in your mouth. Mmmm. I have made homemade bread before but never croissants. I must say it was a long process. In fact, it took three days from the day I started until the final baking! Was it worth it? Well, yes in the sense that I can cross it off my baking to do list. But to be honest, next time I'd rather fly to Paris and enjoy an authentic croissant in a small, romantic French cafe!


I used a recipe from Fine Cooking (so, I guess, I technically failed the challenge) and not Julia's, because Fine Cooking's was super easy to follow and well laid out. I also kept it simple and chose not to add chocolate or anything else to fancy it up...sometimes simple is best!

Sunday, March 27, 2011

Yeasted Meringue Coffee Cake - March 2011 Daring Baker’s Challenge


The March 2011 Daring Baker’s Challenge was hosted by Ria of Ria’s Collection and Jamie of Life’s a Feast. Ria and Jamie challenged The Daring Bakers to bake a yeasted Meringue Coffee Cake. 

This is was a great Daring Baker's Challenge. I usually leave bread making to my bread machine so it was definitely a new experience for me to make a yeast bread from scratch.

Although the recipe looks tough, it is really straight forward and not all that difficult. Feel free to change up the filling - flavours, spices, fruit etc. Lots of Daring Bakers did a more savoury take on this recipe too ...think pizza flavours etc. Go wild!

My coffee cake was sweet and the bread itself is very moist thanks to the meringue. It got rave reviews from the office and kids. Enjoy.


The recipe below is from James and Ria.


FILLED MERINGUE COFFEE CAKE


Makes 2 round coffee cakes, each approximately 10 inches in diameter. The recipe can easily be halved to make one round coffee cake.


Ingredients


For the yeast coffee cake dough:
  • 4 cups (600 g / 1.5 lbs.) flour
  • ¼ cup (55 g / 2 oz.) sugar
  • ¾ teaspoon (5 g / ¼ oz.) salt
  • 1 package (2 ¼ teaspoons / 7 g / less than an ounce) active dried yeast
  • ¾ cup (180 ml / 6 fl. oz.) whole milk
  • ¼ cup (60 ml / 2 fl. oz. water (doesn’t matter what temperature)
  • ½ cup (135 g / 4.75 oz.) unsalted butter at room temperature
  • 2 large eggs at room temperature
For the meringue:
  • 3 large egg whites at room temperature
  • ¼ teaspoon salt
  • ½ teaspoon vanilla
  • ½ cup (110 g / 4 oz.) sugar
For the filling:


1 cup (110 g / 4 oz.) chopped walnuts
1/3 cup Tablespoons (30 g / 1 oz.) brown sugar
1 teaspoon ground cinnamon
1 cup (170 g / 6 oz.) semisweet chocolate chips or coarsely chopped chocolate
1/2 cup butterscotch chips
1/2 cup toffee bits


Prepare the dough:

In a large mixing bowl, combine 1 ½ cups (230 g) of the flour, the sugar, salt and yeast.


In a saucepan, combine the milk, water and butter and heat over medium heat until warm and the butter is just melted.

With an electric mixer on low speed, gradually add the warm liquid to the flour/yeast mixture, beating until well blended. Increase mixer speed to medium and beat 2 minutes. Add the eggs and 1 cup (150 g) flour and beat for 2 more minutes.


Using a wooden spoon, stir in enough of the remaining flour to make a dough that holds together. Turn out onto a floured surface (use any of the 1 ½ cups of flour remaining) and knead the dough for 8 to 10 minutes until the dough is soft, smooth, sexy and elastic, keeping the work surface floured and adding extra flour as needed.


Place the dough in a lightly greased (I used vegetable oil) bowl, turning to coat all sides. Cover the bowl with plastic wrap and a kitchen towel and let rise until double in bulk, 45 – 60 minutes. The rising time will depend on the type of yeast you use.


Prepare your filling. In a small bowl, combine the cinnamon and sugar for the filling if using. You can add the chopped nuts to this if you like, but I find it easier to sprinkle on both the nuts and the chocolate, chips and toffee bits separately.

Once the dough has doubled, make the meringue: In a clean mixing bowl – ideally a plastic or metal bowl so the egg whites adhere to the side (they slip on glass) and you don’t end up with liquid remaining in the bottom – beat the egg whites with the salt, first on low speed for 30 seconds, then increase to high and continue beating until foamy and opaque. Add the vanilla then start adding the ½ cup sugar, a tablespoon at a time as you beat, until very stiff, glossy peaks form.


Assemble the Coffee Cakes:


Line 2 baking/cookie sheets with parchment paper.


Punch down the dough and divide in half. On a lightly floured surface, working one piece of the dough at a time (keep the other half of the dough wrapped in plastic), roll out the dough into a 20 x 10-inch (about 51 x 25 ½ cm) rectangle. Spread half of the meringue evenly over the rectangle up to about 1/2-inch (3/4 cm) from the edges. Sprinkle half of your filling evenly over the meringue (ex: half of the cinnamon-sugar followed by half the chopped nuts and half of the chocolate chips/chopped chocolate).


Now, roll up the dough jellyroll style, from the long side. Pinch the seam closed to seal. Very carefully transfer the filled log to one of the lined cookie sheets, seam side down. Bring the ends of the log around and seal the ends together, forming a ring, tucking one end into the other and pinching to seal.


Using kitchen scissors or a sharp knife (although scissors are easier), make cuts along the outside edge at 1-inch (2 ½ cm) intervals. Make them as shallow or as deep as desired but don’t be afraid to cut deep into the ring.


Repeat with the remaining dough, meringue and fillings. Cover the 2 coffee cakes with plastic wrap and allow them to rise again for 45 to 60 minutes.


Preheat the oven to 350°F (180°C). Brush the tops of the coffee cakes with the egg wash. Bake in the preheated oven for 25 to 30 minutes until risen and golden brown. The dough should sound hollow when tapped.