Showing posts with label birthday party. Show all posts

Monday, September 21, 2015

Harry Potter Birthday Party: The Great Hall and Honeydukes #4


So much candy!
This week I'm sharing the 4th post in my Harry Potter Birthday Party series. Today we're focusing on the Great Hall and Honeydukes - both of which were in our dining room!

If you missed the other posts, check them out:


The Great Hall

Not true to the movie but more inspired by it, we used beautiful gold tablecloths, silver and gold paper plates as well as cheap plastic goblets. I found the goblets at the local Dollarama and the cloth and plates on sale at an art store.

The glow sticks looked waaaaay better in person! The kids loved them...and they lasted for over 10 hours!
I wanted to make the candles hang from the ceiling but I didn't have a tonne of time. Instead, I bought glow sticks and hooks to hang them from the ceiling. I also hung tulle to make it more magical. I have to say the glow stick were the amazing. They looked great during the party even though it was daylight. That night my daughter had three of her best friends sleep over for a Harry Potter movie marathon, and the glow sticks were even more AWESOME.


The Great Feast

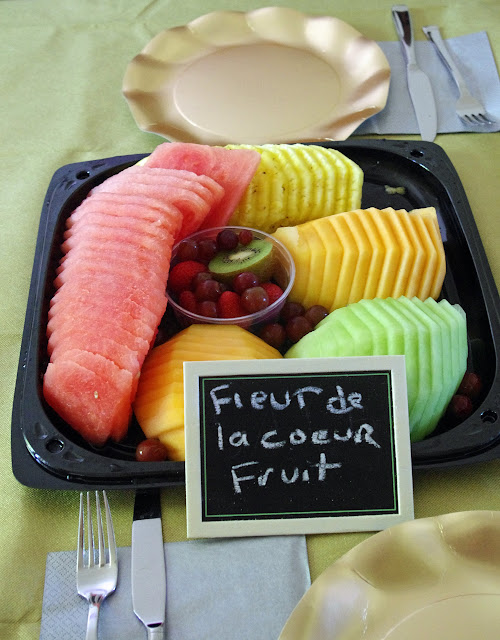
The food itself wasn't really food from the books or movies. We had grilled chicken wings, pizza pops, veggies and fruit. We did, however, give them Harry Potterish names like wicked wings, pizza pasties, fleur de la coeur fruit and herbology bites (veggies).

We served 'pumpkin juice' which was really orange-mango juice!

Gold disposable table cloth, gold and silver plates & napkins and plastic goblets completed the Great Hall Feast.


The kids devoured these wings!


Honeydukes

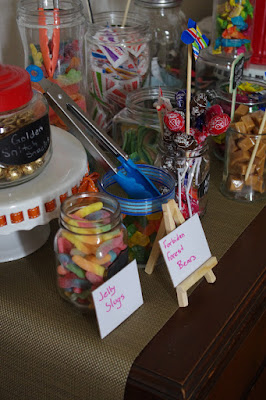
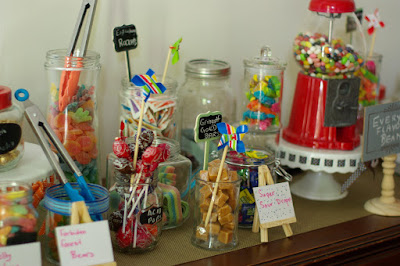
Our dining room side buffet became Honeydukes!

We picked up some Martha Stewart chalk board signs and easels to write out the candy names.
These containers had chalk board sticker already attached and ready to go.


We also bought cheap tongs so the kids could get their candy without sticking their hands in the jars!


For the candy shop, I bought a bunch of cute and cheap glass containers from the dollar store and lots of candy from them too. The candy went into the containers. From Michaels and Dollarama, I bought funky labels (on sale) and we gave the candy HP names including:

  • acid pops (lollipops)
  • gringott gold bars (caramels)
  • exploding rockets
  • laughing taffy
  • love potion necklaces
  • life preservers
  • every flavour beans
  • golden snitch snacks
  • chocolate frogs
  • jelly slugs
  • forbidden forest bears

Chocolate Frogs


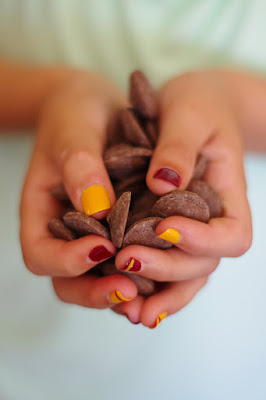
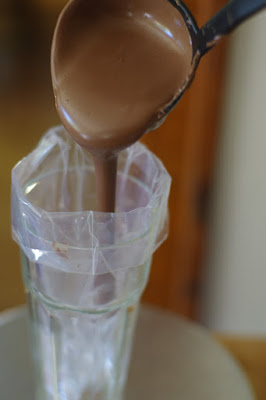
We made our own chocolate frogs. They are simple to make if you have the frog mold. I ordered one (two would have been better as it would have allowed me to make more at once) from amazon.com. The molds make quite a big frog! I melted about 2/3 of a bag of melting candy from Wilton and filled each cavity half full. I then sprinkled rice cereal in the middle and topped it off with more chocolate. I then threw them in the fridge for about 30 minutes to set. I started the process over again until I had about 24 frogs.

I also printed out Honeydukes labels and placed them on some resealable bags so the kids could 'shop' at the store and take their favourites home as part of their loot bag.

Do you love my daughter's Gryffindor coloured nails?!

They look better than this - bad lighting! Lumos!

Loot Bags


What else was in the loot bags? Glad you asked! I found the cutest owl pens at a local art store and Harry Potter magnets at our local toy shop. These with the candy bag went into our loot bags. The bags were simply brown paper bags with a customized thank you sticker attached. Adorable, don't you think?


Thanks for reading! Our next and last Harry Potter birthday party post will be all about the cake!

Friday, August 21, 2015

Harry Potter Birthday Party: The Games and Activities #3


Games and Activities - Harry Potter Birthday Party

Don't you love those Quidditch brooms! Originally, they were just for the Quidditch game we had planned for the back yard but then we had the brilliant idea to turn them into a craft too.

The brooms were only $3 each and we also bought duct tape in a variety of colours and patterns. We set up the broom station in the backyard. The kids decorated their Quidditch brooms by simply wrapping as much or as little tape as they wanted. We also had a bunch of permanent markers in case they wanted to write Nimbus 2000 on it. They loved it! They took them home as part of their loot bags.

Quidditch

After they were finished decorating, they were separated into two teams for the Quidditch match.

The goal posts were made from hoola hoops and mop broom handles from the dollar store. We simply used more duct tape to attach the hoops and handles. The screw end of the handle was pushed into the ground and they stood up quite well. We made 6 hoops and placed 3 on each end of the field.


We based the rules of the game on this post. The kids were divided into two teams. Two balls were placed on the field. There was a medium size one, the Quaffle, that the kids tried to move forward by passing to team members and throwing it through a hoop. This earned them one point. There was also a second bigger ball, a Bludger, that the kids could pick up and throw. When the bigger ball hit you, you had to freeze for 5 seconds and drop the smaller ball (if you had it). All the balls were squishy so no one could get hurt.

Finally the snitch (a yellow tennis ball) was held by an adult and was thrown in at a random time. Whichever team caught it received extra points.
 
For the first few games the kids played the games while on their brooms. They had to keep the brooms between their legs to keep getting hit to a minimum. But they eventually placed the brooms aside and kept playing.


We printed out banners for each House!

Flying

The brooms also served another great purpose - photos! Each child climbed onto their brooms and then jumped off the seat bench of our picnic table. After the party, I photoshopped (very roughly) a Quidditch pitch background. We sent it to the kids after the party as a thank you.  It was a great surprise for them.
From this:


to this:

Ministry of Magic Memo Game

I found this great blog that showed how to make Ministry of Magic Memos in detail. At first, I was going to use the memos as decorations but then came up with the idea of using them into a game!

We reused a huge piece of corrugated plastic board that was going to be thrown out. We simply cut out circles in three sizes - big, medium and small. Next we printed out a bunch of names of people who worked at the Ministry of Magic including Delores Umbridge, Arthur Weasley, Mad Eye Moody, Bartemis Crouch, and four others. You can find a list of employees here. Pick your faves! Finally, I printed off the Ministry logo and "Ministry of Magic Mailboxes".

The game is simple enough - just make a line (we used a broom) and have the kids throw the memos through the holes. The smaller the hole the more points it is worth. We did it as individual players but you could do teams if you sort the guests into different houses.
www.withinthekitchen.blogspot.com
Flying the memos threw the holes is harder than it looks!


Trivia

This one was simply a Harry Potter trivial pursuit game I found on amazon.com. We used it at the party but it was also a birthday gift. 

It would be pretty easy to come up with your own trivia though and save some dollars, if you don't think you'd play it much.

After all the activities were completed, we moved back into the house for food and a trip to Honeydukes! Come back to read the next post for details!

And check out our previous Harry Potter Birthday Party Posts:
Decorations
Invitations
Food


Saturday, August 8, 2015

Harry Potter Party: Decorations #2

www.withinthekitchen.blogspot.com
Start at the beginning here. And then  here for games and activities . And here for the food. It describes the beginning of our daughter's 11th birthday party - Harry Potter themed obviously! My bit of advice this week is to start the decorating process as early as possible. If you have an idea of the type of things you'll need, you'll be able to find good prices on things as you're out and about in daily life instead of panicking at the last minute before the party! That's how I found the owls for the Owlery and potion jars.

This post will cover our decorations for our King's Cross Station, the Portrait Hall, the Gryffindor Common Room, the Owlery, Potions and Herbology decorations.

King's Cross Station

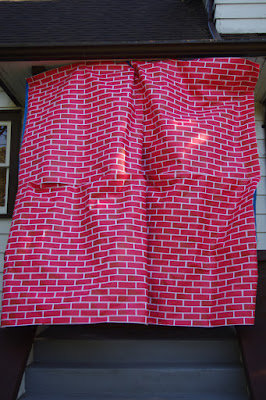
Our front door was covered by a "brick wall". I found brick-wall craft paper at Michaels (it was in the school section - I think it was meant for bulletin boards or as class decorations) which I then taped onto 2 tarps so the kids could walk through it. If you have the time you could paint the wall on a sheet like they did here. At our party, the kids handed in their Hogwarts' Express Ticket (included in their invitation) and then went through the wall. Upon walking through the wall, the kids entered the Portrait Hall.


www.withinthekitchen.blogspot.com

I just printed these off the net. 

Portrait Hall

To create the Portrait Hall we simply printed off many Hogwarts or Hogwarts-like pictures found in the movies. I found most of them on Harry Potter Wiki. Check  here for great pics.

www.withinthekitchen.blogspot.com

In the same area we also posted Educational Decrees. You can find them here and just print them off.
www.withinthekitchen.blogspot.com

Owlery/Potions

www.withinthekitchen.blogspot.com


www.withinthekitchen.blogspot.com
A few owls on a window sill makes a great owlery!
(We added a few regular birds in cages but the kids didn't seem to mind!)

www.withinthekitchen.blogspot.com

Our living room was a mix of areas. First, we had the Owlery. At our local Dollar Store we found a variety of cute owls - all under $5 each. We placed them on a window sill and I made an "owlery" sign to place underneath. Simple and cute!

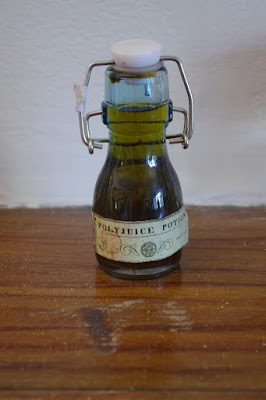
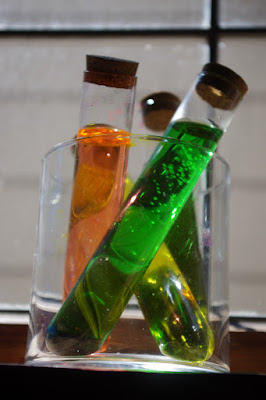
We have a Harry Potter book with some potion labels so I just photocopied them and taped them to some little bottles for a Potions Class effect. We added food colouring to some water to represent potions.


www.withinthekitchen.blogspot.com

www.withinthekitchen.blogspot.com


We had potions in another window and in some glass cupboards. Most of these were jars that I already had or picked up at the Dollar Store and then filled with colored water. In a few of the jars, we placed toy spiders, worms, and other icky things we found! 

Gryffindor Common Room


www.withinthekitchen.blogspot.com
The portrait of the  Godric Gryffindor,one of Hogwarts founders, was given a place of honour in our Gryffindor Common Room

The living room door also had a picture of the fat lady on it and, of course, a password was needed to get in when it became the Gryffindor Common Room.
www.withinthekitchen.blogspot.com

www.withinthekitchen.blogspot.com
I ordered this poster online. We used it as decoration in the Gyffindor Common Room on the day of the party but it looks great hanging in her room now.
In the room, we placed some posters that I had ordered on line, a Gryffindor Notice Board. The Board was my daughter's idea and I loved it! She wrote a bunch of notes and announcements for it and even added a few socks in case any House Elves wanted freedom!

www.withinthekitchen.blogspot.com
Love this Notice Board! We found the Gryffindor crest online. It's removable and re-positionable so after the party we moved it to my daughter's bedroom wall.

www.withinthekitchen.blogspot.com

www.withinthekitchen.blogspot.com


www.withinthekitchen.blogspot.com
Finally, we hung a portrait of Professor Dumbledore and one of his sister.

Herbology

www.withinthekitchen.blogspot.com
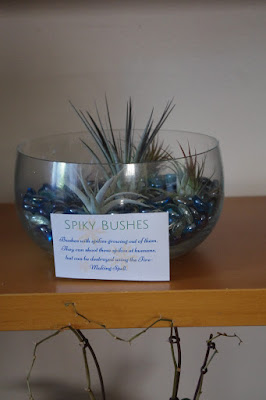
On the other side of the room was our Herbology section. I printed a bunch of plants descriptions from the books and movies and placed them in front of plants we already had. I loved the addition of the Mandrakes (which were really troll dolls found, of course, at the Dollar Store).
www.withinthekitchen.blogspot.com

www.withinthekitchen.blogspot.com

www.withinthekitchen.blogspot.com

www.withinthekitchen.blogspot.com


I found a Herbology Do's and Dont's list here that we stick to the wall above the plants.

Next post will describe our Harry Potter birthday party games and activities.