Pages

Friday, August 21, 2015

Harry Potter Birthday Party: The Games and Activities #3


Games and Activities - Harry Potter Birthday Party

Don't you love those Quidditch brooms! Originally, they were just for the Quidditch game we had planned for the back yard but then we had the brilliant idea to turn them into a craft too.

The brooms were only $3 each and we also bought duct tape in a variety of colours and patterns. We set up the broom station in the backyard. The kids decorated their Quidditch brooms by simply wrapping as much or as little tape as they wanted. We also had a bunch of permanent markers in case they wanted to write Nimbus 2000 on it. They loved it! They took them home as part of their loot bags.

Quidditch

After they were finished decorating, they were separated into two teams for the Quidditch match.

The goal posts were made from hoola hoops and mop broom handles from the dollar store. We simply used more duct tape to attach the hoops and handles. The screw end of the handle was pushed into the ground and they stood up quite well. We made 6 hoops and placed 3 on each end of the field.


We based the rules of the game on this post. The kids were divided into two teams. Two balls were placed on the field. There was a medium size one, the Quaffle, that the kids tried to move forward by passing to team members and throwing it through a hoop. This earned them one point. There was also a second bigger ball, a Bludger, that the kids could pick up and throw. When the bigger ball hit you, you had to freeze for 5 seconds and drop the smaller ball (if you had it). All the balls were squishy so no one could get hurt.

Finally the snitch (a yellow tennis ball) was held by an adult and was thrown in at a random time. Whichever team caught it received extra points.
 
For the first few games the kids played the games while on their brooms. They had to keep the brooms between their legs to keep getting hit to a minimum. But they eventually placed the brooms aside and kept playing.


We printed out banners for each House!

Flying

The brooms also served another great purpose - photos! Each child climbed onto their brooms and then jumped off the seat bench of our picnic table. After the party, I photoshopped (very roughly) a Quidditch pitch background. We sent it to the kids after the party as a thank you.  It was a great surprise for them.

From this:


to this:

Ministry of Magic Memo Game

I found this great blog that showed how to make Ministry of Magic Memos in detail. At first, I was going to use the memos as decorations but then came up with the idea of using them into a game!

We reused a huge piece of corrugated plastic board that was going to be thrown out. We simply cut out circles in three sizes - big, medium and small. Next we printed out a bunch of names of people who worked at the Ministry of Magic including Delores Umbridge, Arthur Weasley, Mad Eye Moody, Bartemis Crouch, and four others. You can find a list of employees here. Pick your faves! Finally, I printed off the Ministry logo and "Ministry of Magic Mailboxes".

The game is simple enough - just make a line (we used a broom) and have the kids throw the memos through the holes. The smaller the hole the more points it is worth. We did it as individual players but you could do teams if you sort the guests into different houses.
www.withinthekitchen.blogspot.com
Flying the memos threw the holes is harder than it looks!


Trivia

This one was simply a Harry Potter trivial pursuit game I found on amazon.com. We used it at the party but it was also a birthday gift. 

It would be pretty easy to come up with your own trivia though and save some dollars, if you don't think you'd play it much.

After all the activities were completed, we moved back into the house for food and a trip to Honeydukes! Come back to read the next post for details!

And check out our previous Harry Potter Birthday Party Posts:
Decorations
Invitations
Food


Friday, August 14, 2015

Quick and Easy Chicken Pot Pie


www.withinthekitchen.blogspot.com


As much as I enjoy making my own stock, pie crusts from scratch and fresh farmers market veggies, there are times when I just don't have the time...or motivation, or time or desire or time to make a pot pie from scratch! This is especially true in the heat of the summer. 

So when my daughter asked for chicken pot pie for dinner, I wanted to say no, how about ... pretty much anything else. Instead, I went the quick and easy route - store bought rotisserie chicken, store bought pie crust, some fresh and some frozen veggies, and even gravy from a package. I know, some of you stopped reading at "store bought" but for the rest of you who don't mind the easy way out on occasion (and seriously, who hasn't earned an easy night now and then), you'll love how this pot pie reminds you of the ones your mom made when you were a kid (or the frozen ones she threw in the oven). They don't call it comfort food for nothin'.

Ingredients

1 rotisserie chicken (3-4 c chicken)
1 tbsp butter
2 packs instant gravy powder (or 2 cups gravy)
2 c water
2 c chicken stock
2 carrots, diced
3 celery stalks, diced
1 medium onion, diced
2 tbsp tomato paste
3 cloves garlic, crushed
1 tsp smoked paprika
1/4 tsp cayenne
1/2 tsp chipotle powder
1/2 c grated cheese
1 c frozen corn
1 c frozen peas
1  double pie crust, store bought

Directions


  1. Pull apart chicken into small chunks.
  2. Set aside.
  3. Melt butter in large sauté pan over medium high heat.
  4. Add onions and stir . Cook for 3 minutes.
  5. Add garlic. Stir for one minute.
  6. Add spices. Stir for another minute.
  7. Add tomato paste. Stir for 1 minute.
  8. In large bowl or 4 cup measuring cup, whisk together gravy powder, water and stock.
  9. Add to sauté pan.
  10. Add chicken. Stir.
  11. Bring to a boil. Reduce heat to medium and simmer for 5-10 minutes until mixture starts to thicken.
  12. Remove from heat,
  13. Add cheese.
  14. Stir.
  15. Add peas and corn. Stir.
  16. Let sit while you roll out pie crusts.
  17. Line 9 inch pie plate with bottom pie crust.
  18. Pour in chicken mixture.
  19. Quickly top with remaining pie crust.
  20. Cut in vent holes in the top crust.
  21. You may want to wrap a bit of foil around the edges to prevent over browning (but take it off after the first 20 minutes of baking).
  22. Place in oven for approximately 40-45 minutes until golden brown.
www.withinthekitchen.blogspot.com


Saturday, August 8, 2015

Harry Potter Party: Decorations #2

www.withinthekitchen.blogspot.com
Start at the beginning here. And then  here for games and activities . And here for the food. It describes the beginning of our daughter's 11th birthday party - Harry Potter themed obviously! My bit of advice this week is to start the decorating process as early as possible. If you have an idea of the type of things you'll need, you'll be able to find good prices on things as you're out and about in daily life instead of panicking at the last minute before the party! That's how I found the owls for the Owlery and potion jars.

This post will cover our decorations for our King's Cross Station, the Portrait Hall, the Gryffindor Common Room, the Owlery, Potions and Herbology decorations.

King's Cross Station

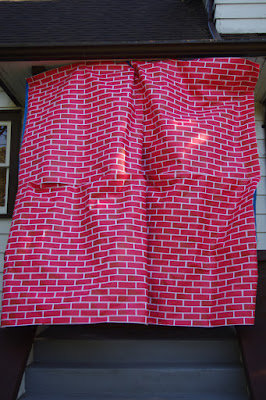
Our front door was covered by a "brick wall". I found brick-wall craft paper at Michaels (it was in the school section - I think it was meant for bulletin boards or as class decorations) which I then taped onto 2 tarps so the kids could walk through it. If you have the time you could paint the wall on a sheet like they did here. At our party, the kids handed in their Hogwarts' Express Ticket (included in their invitation) and then went through the wall. Upon walking through the wall, the kids entered the Portrait Hall.


www.withinthekitchen.blogspot.com

I just printed these off the net. 

Portrait Hall

To create the Portrait Hall we simply printed off many Hogwarts or Hogwarts-like pictures found in the movies. I found most of them on Harry Potter Wiki. Check  here for great pics.

www.withinthekitchen.blogspot.com

In the same area we also posted Educational Decrees. You can find them here and just print them off.
www.withinthekitchen.blogspot.com

Owlery/Potions

www.withinthekitchen.blogspot.com


www.withinthekitchen.blogspot.com
A few owls on a window sill makes a great owlery!
(We added a few regular birds in cages but the kids didn't seem to mind!)

www.withinthekitchen.blogspot.com

Our living room was a mix of areas. First, we had the Owlery. At our local Dollar Store we found a variety of cute owls - all under $5 each. We placed them on a window sill and I made an "owlery" sign to place underneath. Simple and cute!

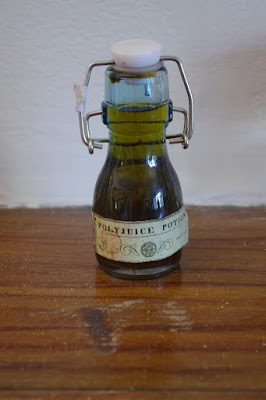
We have a Harry Potter book with some potion labels so I just photocopied them and taped them to some little bottles for a Potions Class effect. We added food colouring to some water to represent potions.


www.withinthekitchen.blogspot.com

www.withinthekitchen.blogspot.com


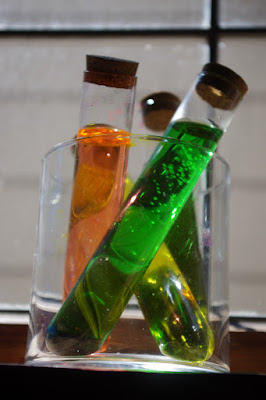
We had potions in another window and in some glass cupboards. Most of these were jars that I already had or picked up at the Dollar Store and then filled with colored water. In a few of the jars, we placed toy spiders, worms, and other icky things we found! 

Gryffindor Common Room


www.withinthekitchen.blogspot.com
The portrait of the  Godric Gryffindor,one of Hogwarts founders, was given a place of honour in our Gryffindor Common Room

The living room door also had a picture of the fat lady on it and, of course, a password was needed to get in when it became the Gryffindor Common Room.
www.withinthekitchen.blogspot.com

www.withinthekitchen.blogspot.com
I ordered this poster online. We used it as decoration in the Gyffindor Common Room on the day of the party but it looks great hanging in her room now.
In the room, we placed some posters that I had ordered on line, a Gryffindor Notice Board. The Board was my daughter's idea and I loved it! She wrote a bunch of notes and announcements for it and even added a few socks in case any House Elves wanted freedom!

www.withinthekitchen.blogspot.com
Love this Notice Board! We found the Gryffindor crest online. It's removable and re-positionable so after the party we moved it to my daughter's bedroom wall.

www.withinthekitchen.blogspot.com

www.withinthekitchen.blogspot.com


www.withinthekitchen.blogspot.com
Finally, we hung a portrait of Professor Dumbledore and one of his sister.

Herbology

www.withinthekitchen.blogspot.com
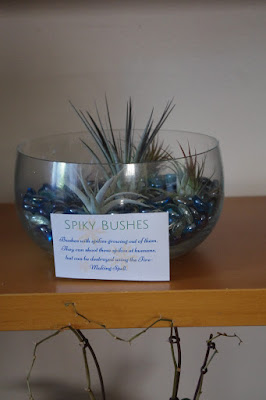
On the other side of the room was our Herbology section. I printed a bunch of plants descriptions from the books and movies and placed them in front of plants we already had. I loved the addition of the Mandrakes (which were really troll dolls found, of course, at the Dollar Store).
www.withinthekitchen.blogspot.com

www.withinthekitchen.blogspot.com

www.withinthekitchen.blogspot.com

www.withinthekitchen.blogspot.com


I found a Herbology Do's and Dont's list here that we stick to the wall above the plants.

Next post will describe our Harry Potter birthday party games and activities.