Pages

Wednesday, October 31, 2012

Foodie Penpals - October!

Foodie PenPals. Have you heard of it? It's a great program run by Lindsay over at the Lean Green Bean. She started it in September 2011 with 30 participants and it has grown to over 1300! Now that's success! In a nutshell each participant receives a foodie pen pal to send a little foodie related package that shouldn't cost more than $15 (not including shipping). It can be home made goods, local  food items, or other foodie related treats. Then each person sending a package also receives a similar package (though not from the person they sent one too). Organizing it must take a lot of dedication and effort and Lindsay does a great job of pulling everything together!
My first Foodie Penpal package! Thanks Danielle!


This month was my first time participating in the program and it was so a lot of  fun. I loved going to Granville Island and buying little things for the package I sent to Kayla at KitchenofKy. And just as much fun was receiving my food pen pal package from Danielle of Eating Running Living

Danielle sent some amazing items - none of which I had tried before! The chocolate lasted about 5 minutes before I tore it open. It was fantastic - and really smooth - yum. My favorite thing by far was the Chicago style popcorn. Have you ever tried it? It sounds crazy but it's caramel corn and cheddar popcorn mixed together. It tastes amazing! In fact, we went out and bought another bag a couple of days later :)

I didn't share the chocolate or the popcorn with the kids but I did let them try the other bars. They loved those and I only ended up with a bite of each! We all loved the granola with dried strawberries and pieces of chocolate and the naan crackers were great with hummous!

Thanks Danielle for such a great introduction to Foodie Pen Pals!

Want to become a foodie penpal? Read this from Lindsay:

-On the 5th of every month, you will receive your penpal pairing via email. It will be your responsibility to contact your penpal and get their mailing address and any other information you might need like allergies or dietary restrictions.

-You will have until the 15th of the month to put your box of goodies in the mail. On the last day of the month, you will post about the goodies you received from your penpal! 

-The boxes are to be filled with fun foodie things, local food items or even homemade treats! The spending limit is $15. The box must also include something written. This can be anything from a note explaining what’s in the box, to a fun recipe…use your imagination!

-You are responsible for figuring out the best way to ship your items depending on their size and how fragile they are. (Don’t forget about flat rate boxes!)

-Foodie Penpals is open to blog readers as well as bloggers. If you’re a reader and you get paired with a blogger, you are to write a short guest post for your penpal to post on their blog about what you received. If two readers are paired together, neither needs to worry about writing a post for that month. 

-Foodie Penplas is open to US & Canadian residents.  Please note, Canadian Residents will be paired with other Canadians only. We've determined things might get too slow and backed up if we're trying to send foods through customs across the border from US to Canada and vice versa. 
If you’re interested in participating for November, please CLICK HERE to fill out the participation form and read the terms and conditions. 

You must submit your information by November 4th as pairings will be emailed on November 5th!

*If you're from somewhere besides the US, Canada or Europe and want to participate, send me an email and I'll see if we get enough interest this month!

Sunday, October 21, 2012

Simple Tomato Soup to Welcome Fall


Summer extended its stay in Vancouver this year - warm, sunny days made us forget that fall would have to  return to our beautiful city. Of course, fall in Vancouver means quite a few grey, cool, rainy days. Fall has indeed returned over the last week.  Although we will continue to complain about the rain as all Vancouverites do, we'll also remember the sunny and dry days of September. September allowed us to extend our growing season a bit and helped our own backyard to produce a bumper crops of apples, radishes, carrots and tomatoes.

Our apple tree was also popular with the neighbourhood squirrels, birds and the occasional raccoon! The birds also loved the seeds from our sunflower plants that we hung to dry! 
Our Cox's Orange Pippin apple tree.


This little bird had a great afternoon feast on our sunflower seeds!


After the feast she rested in our vegetable garden.


We still have quite a few beautiful tomatoes growing!

Besides eating our tomatoes in salads and salsa, I've been making this simple  and delicious tomato soup. I've used up to three pounds of tomatoes in this recipe. You can also use it as a pasta sauce!

Ingredients

  • 1 celery stalk,
  • 2 medium carrot, peeled
  • 2 small onions
  • 3 cloves garlic
  • 2lb fresh tomatoes, skinned, roughly chopped into large pieces
  • 1 cup fresh basil leaves
  • 3 tbsp extra virgin olive oil
  • ½ tsp salt

What to do

This tomato soup recipe makes about 6 cups.
  • Dice the celery, carrot, onion and garlic, roughly all the same size.
  • Bring a large pot of water to boil. Carefully drop the tomatoes into the water for one minute or until skin bursts. Remove the tomatoes and place into a bowl of ice water.  You should be able to peel the skins quite easily now. 
  • Chop the tomatoes into large pieces and place in large pot or dutch oven.
  • Layer the carrots, celery, onions and garlic onto the tomatoes.
  • Add the basil and sprinkle salt on top.
  • Drizzle the olive oil on top.
  • On medium heat, bring soup to a boil and then reduce to a simmer. Simmer for one hour.
  • Using use an immersion blender, blend soup to desired consistency. (Beware – if you use a blender to do this make sure your soup has cooled completely to avoid the heat of soup blowing of the blender lid risking burns and a huge mess.)


Saturday, October 13, 2012

Lemon Raspberry Tart


For thanksgiving we made a Turducken! With such a rich bird(s) plus the regular sides of potatoes, roasted veggies, creamy carrots, buns and salad, I wanted to offer a variety of desserts that included something lighter tasting. We had pumpkin pie, homemade peanut butter cups (ok richest dessert EVER...recipe coming soon) and this simple lemon tart garnished with raspberries.

The recipe is adapted  from The Art of Perfect Baking by Flo Braker. The key is to roll the pastry very thin (1/8 inch). The filling is very simple and the tangy lemon flavour can't be beat after a heavy meal! You should note that the pastry recipe almost triples what you need for this recipe but just store the remainder in your freezer for your next tart.

Pastry
1 cup unsalted butter, softened
2-1/2 c flour
1/8 tsp salt
1/2  c sugar
1 egg, large
1 tsp vanilla

Pan: 9 inch quiche pan with removable bottom.

What to do

  • In a small bowl, mix the eggs and vanilla to combine. Set aside.
  • Add flour, salt and sugar into large stand mixer bowl. Mix on the lowest speed to combine.
  • Cut butter into half inch pieces and scatter over dry  ingredients.
  • Mix on low speed until the mixture looks like coarse crumbs (2 minutes).
  • With the mixer on low speed add the eggs and vanilla slowly but steadily until the dough comes together. This should take about 40 seconds.
  • Knead the dough for a minute or two until it is smooth.
  • For this tart you will need to weigh out 9  oz or measure a scant cup of dough.
  • Wrap the extra dough and freeze for up to one month.
  • Press the remaining dough into a 5 inch disc and wrap in plastic wrap. Refrigerate for at least an hour.
  • Bring dough to room temperature and preheat oven to 375 degrees F.
  • Using a lightly floured work surface, gently roll out the dough so it is approximately 11 inch wide and 1/8 inch thick. Carefully fit the dough into the pan. Trim the overhang by rolling the rolling pin over it.
  • Bake for 10-12 minutes BUT after 5 minutes check the pastry for blistering. If there are air pockets forming prick the pastry with a fork in 4 or 5 places. Continue baking until set.


Filling 
2 eggs
6 tbsp fresh squeezed lemon juice
3/4 c sugar
4 tbsp unsalted butter, cooled to room temperature
zest from two lemons

What to Do


  • Slightly beat eggs in a medium sized bow. Add sugar and whisk. Add lemon juice and whisk again. Add melted butter and zest and mix for the last time.
  • Pour into pastry shell and bake for 16-18 minutes more. The filling will bubble towards the end of the cooking time.
  • Remove from the oven and cool for 15 minutes. Carefully release the tart from the sides of the pan. Cool completely.
  • Add the raspberries in any design desired. Serve!

Wednesday, October 10, 2012

Turducken Thanksgiving

So a few weeks ago, my husband and I were thinking about what to serve for Thanksgiving. Usually we do turkey but every now and then we like to try something a little different... like the year we made beef a la mode (thanks Julia!). This year we were batting around the idea of smoking a pork shoulder or ribs but still hadn't made a final decision. The morning after this conversation I received an email asking me if I'd like to try an Echelon frozen turducken for Thanksgiving and then blog about my experience....um, hello, providence, is that you? 

Now, in case you have never heard of turducken, it is a duck stuffed inside a chicken stuffed inside a turkey! That's a lot of bird! This turducken is produced by a Canadian company called Echelon and in between each bird is a layer of Italian sausage stuffing (because we don't want the pigs to be left out of the holiday season). 

Our 12 lb turducken arrived frozen solid so we had to defrost it in the fridge for 5 days - that's right FIVE days! 

It's going into the oven at 10 am so it can roast long and slow. I'll give you the play-by-play as the day goes on...

10:07 am 

OK, it's in the oven. And I have to say I already like that all I had to do was open the packaging, put the bird(s) on the roaster and put in it in the oven at 225 degrees F - no stuffing, no seasoning, no mess!! Well, ok, I did sprinkle a little smoked paprika on it but it's already seasoned so wasn't really necessary :)


11:10 am


It smells yummy already!

Noon


Well, this play by play is gonna be boring cause other than smelling great, this turducken is smooth sailing. I don't have to baste it, foil it, or really even look at it!

2 pm


Turducken is still in the oven and browning nicely. I also have lots of time to peel and dice the veggies I'm going to roast on the barbeque - yams, parsnips, onions, beets, fennel and squash. 

3 pm

Turducken smells great still! And now I'm making the Gruyère mashed potatoes. Once they're done I'll keep them warm by placing them over a bigger pot of simmering water - that way they won't dry out or burn. 

4 pm

I cheated and bought gravy at a local soup shop - as much as I love home-made gravy the last minute prep of it gets in the way when I'm trying to get everything on the table. I made cranberry sauce yesterday so it's ready to go and I bought half baked buns on Granville Island so they can be popped into the oven once it's closer to eating time.

5 pm

The turducken is officially roasted! I've taken it out of the oven and I'm going to let it sit for 45 minutes. From what I've read giving the turducken enough time to rest can mean the difference from a bird that is easy to carve to one that falls apart (no bones to keep it together). With the extra minutes my  MILs delicious creamy carrot dish can go into the oven. 


5:45 pm

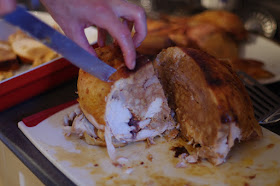
Hubby takes off the turkey legs and wings (the only thing that has bones). He then makes a long cut down the turducken to cut it in half. It looks like nothing I've ever seen before! It's easy to see the different birds and there is lots of stuffing between the layers. Hubby says the key to successful carving is slicing the turducken thicker than a normal turkey slice. 


Our 12 lb turducken fed 6 adults and 4 kids with enough leftovers to feed everyone again so I'm sure it would easily feed 10-12 adults. 


The Italian sausage stuffing was amazing! I pretty sure it helped to keep the turducken moist. It was definitely moister than a regular turkey. To be honest, I'm not sure I could differentiate the tastes of each bird and the italian sausage stuffing was quite pronounced. BUT I loved the overall flavour of it. I think a turducken is a great way to impress guests and it certainly is a conversation starter. 

Overall impressions


  • I loved the ease of preparation of the turducken - defrost and pop in the oven.
  • Moister than a regular bird. 
  • Easy to carve - no bones!
  • Comes with stuffing - one less thing to worry about!
  • Feeds an army!
  • Everyone is eager to try it!


The Echelon turducken was a hit with my guests young and old(er) so I definitely recommend it if you are even thinking about trying one. Check out their site to find out where you can buy one for your next special dinner party.

Tuesday, October 2, 2012

Graveyard Halloween Brownies


These brownies were a hit with my kids...and really  how could they not be?? Brownies, icing, cookies, and green candy all in one dessert equals kid nirvana! 


The only special equipment you'll need is the skeleton candy mould. The one I used is made by Wilton and I bought it at Michael's craft store. The skeletons are easy to make - you just melt the candy, pour it in the mould and let set. I made them in both green and white but the kids liked the green ones better so we used them in the graveyard (and ate the white ones while we worked - i.e. I worked and they watched...and ate :)


The gravestones are also easy to make! I just used store bought chocolate wafers and cut off a little of one end. I iced them with some store bought icing that I had tinted grey with just a smidge of black food colour gel. 


Ingredients 


1 tub white icing (3/4 c)
1 tub chocolate icing (or approximately 1-1/2 c)
1 sleeve chocolate wafers (9 oz/255g)
1 bag green candy melts
black food colouring


For brownies


Ingredients
1-1/2 c butter, unsalted
2-1/4 c sugar
4 eggs
2 tsp vanilla
1 c flour
1 c cocoa
1/2 tsp salt

What to do
  • Preheat oven to 350 degrees.
  • Grease and flour a 9x13 inch pan. This is important because you'll want to remove the brownies from the pan in one piece.
  • Over low heat, melt butter in a saucepan.
  • Add sugar and stir until well combined and some sugar dissolves. It will still be thick and 'sugary' looking.
  • Cool the mixture to room temperature.
  • Place in large mixing bowl.
  • Add eggs one at a time and beat until well combined- about 4 minutes.
  • In another bowl, sift together.
  • Add dry ingredients to butter mixture and stir until just combined.
  • Pour batter into pan and smooth with spatula.
  • Bake for 30-35 minutes.
  • Don't over bake!
  • Cool completely before moving on.
Candy Skeletons
You'll need the mould and a bag of green candy melts. Follow directions for melting the candy and moulds that are on the packages. Make 2 sets of skeletons (i.e. 4 skeletons)

Putting the graveyard together
Gently release the cooled brownies from the pan and place on your serving platter or tray. Frost the brownies with your chocolate icing - this doesn't have to look perfect because you are going to cover it up!

Put aside 11 whole cookie wafers. Put the rest in a Ziploc bag and crush them into crumbs with a rolling pin (my 6 yr old son used a hammer from his tool kit - who says baking isn't masculine???!). Sprinkle the crumbs over the iced brownies.

Using a sharp knife, cut off about 1/2 inch or 1 cm of the ends of the wafer cookie so it resembles a grave stone. You won't need all 11 cookies but you'll want to have a few extras just in case the cookie crumbles!

Tint 1/2 c white icing gray by adding a couple drops of black food colouring. Then use a small spatula to cover the fronts of the headstones with the gray icing. If desired, use some of the left over white icing to write on your gravestones!

Place two headstones on the back row of your graveyard. Gently press them into the chocolate icing to secure. Then place some skeleton pieces in from each headstone. (The entire skeleton is quite big so you will probably just use part of one per grave). Squish some of the "bones" into the crumbs to make it look like they are coming out of the earth. 

Repeat with remaining headstones and skeleton pieces.

Boo-tiful, right?

Happy Halloween!